
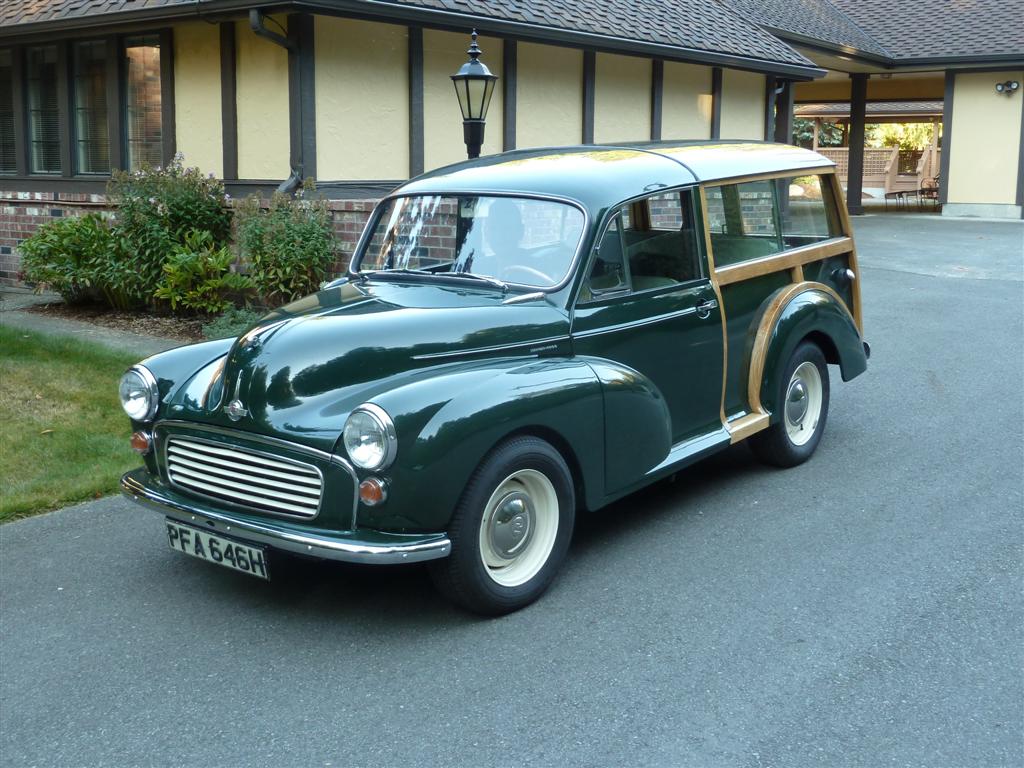
When someone likes their Morris Traveller as much as I, it's hard to resist getting a second one that shows up on eBay. I found a British racing green one (well, that's what I declare the color to be) that had been refurbished in England, and was just off the ship after being imported to the Bay area. Surprisingly, the paperwork to get it licensed wasn't difficult. This one is similar to my blue one, but I like the color combination better, it has a nicer interior, and better woodwork. I decided to make the drivability upgrades similar to those I made on the blue one to allow it to cope with modern traffic.
My web page has a lot of the details about the blue Woody, so I won't go into them here. I'll address some of the other modifications I made, and a few new things that I have learned about Morris Minors. Perhaps this information will be interesting to you.
While I can appreciate the nature of right-hand drive, I decided to switch it over to left-hand drive. Even though it doesn't take long to start feeling at-ease sitting on the wrong side, and getting used to shifting with your left hand, another reason for switching was that my wife, as a passenger, felt like she was in the death seat, next to opposing traffic, but with no control of things.
How hard could it be to switch to LHD? The instruments are in the center, and I even read one place on the net that you just have to flip the rack and pinion over and bolt it back together. Otherwise, I couldn't find a site that discussed how to do this. Well, projects like this begin with false optimism, and that's good, since you might not start the project otherwise.
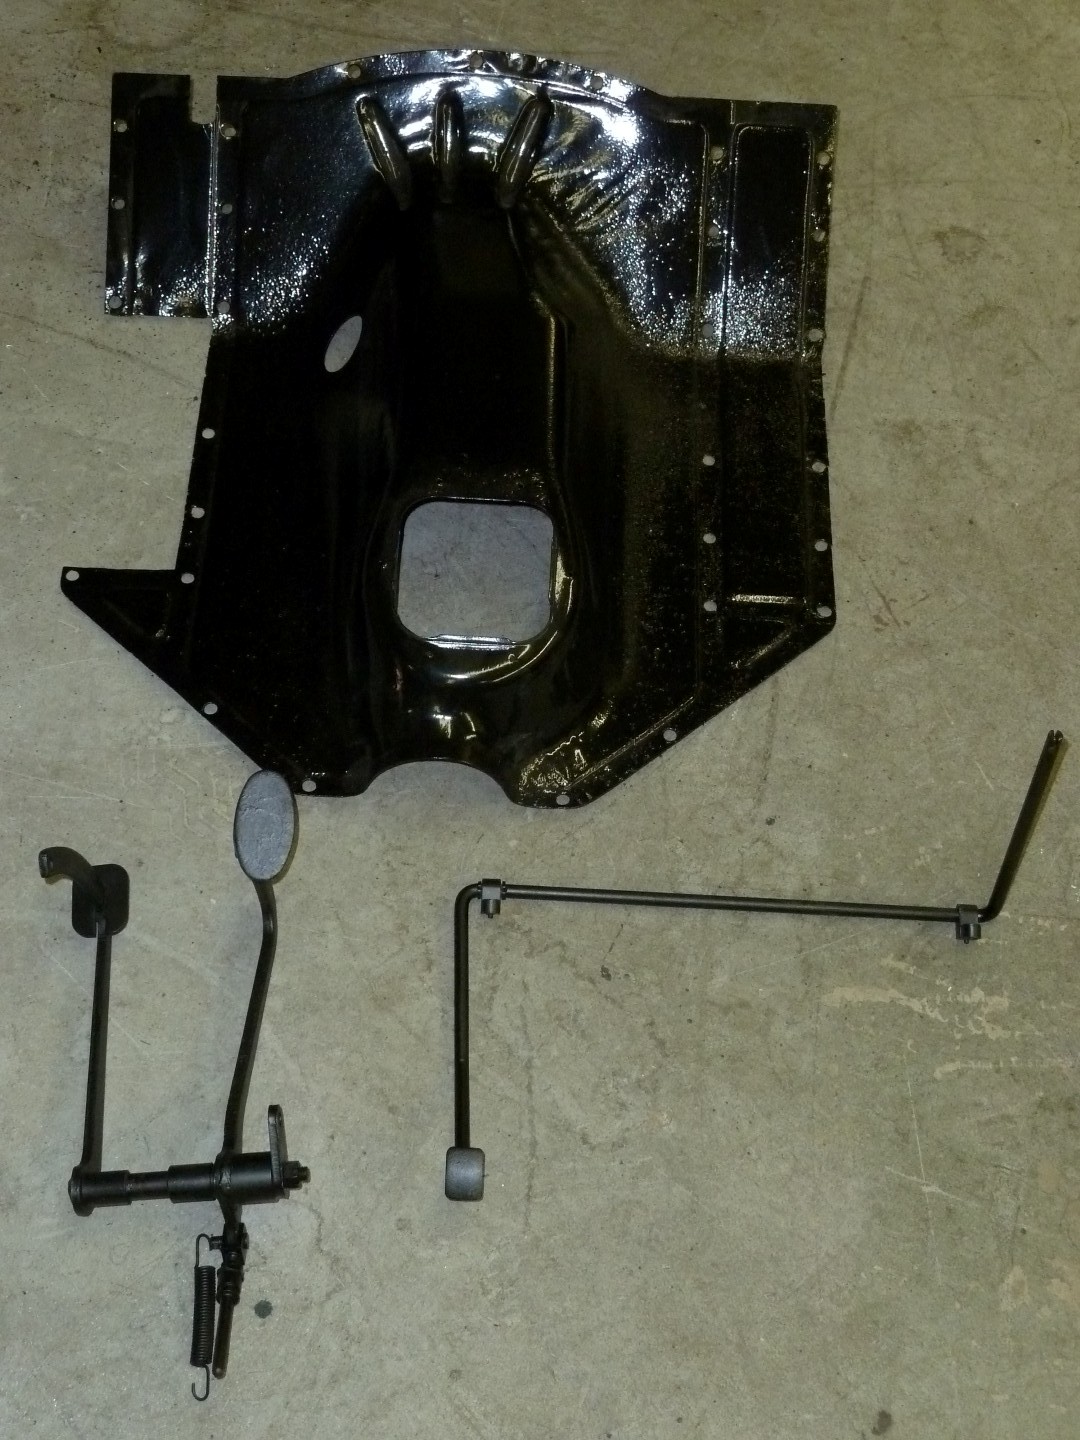
First, I started to think about flipping over the rack and pinion, and realized that the steering wheel would turn the wrong direction. That would take more getting used to than sitting on the right side. Fortunately, I found a Morris hulk that was left-hand drive, and got the rack and pinion, along with some other parts. Here are the parts (other than rack-and-pinion) after I cleaned them up and added some finish...
It's my understanding that the rack and pinion is the same as Sprites and MG Midgets (Spridgets), but I haven't confirmed that. If it is the case, a left-hand drive Spridget rack would be the same as a right-hand drive Morris, and vice-versa. That's because the rack is mounted behind the wheels on a Morris, and ahead of the wheels on a Sprite/Midget. In any case, changing the rack and moving the steering wheel wasn't difficult, and soon I was sitting behind the wheel on the left hand side. Since the car was designed to be built either way, all the holes are there make this change. Even the turn signal wires are long enough to reconnect on the other side. Only new hole necessary for the steering wheel change was a new oval opening in the package tray for the steering wheel shaft.
It started to seem like I was almost there with this task. However, the steering change is the easy part of the job. The pedals are still on the right side. In order to change the pedals over, you need new "hump" sheet-metal that has the cutout for the brake master cylinder on the other side. It may be feasible to modify the original by cutting out the section over the master cylinder and rewelding it on the other side, but there is also a notch in the top front that would need the same treatment.
Then, you need a new pedal assembly, since the RHD one just won't work on a LHD car. For example, the clutch actuation lever would be facing the outside, rather than the inside. And the clutch pedal itself on a RHD car is one-piece, and those on LHD cars have a removable pedal pad for going through the hole in the floor. The gas pedal is entirely different.
The pedal assembly goes through the frame, and while there are cutouts in the frame on the left side for the pedal rod bushings, they aren't installed, and aren't made to be easily removed from the original side. I found bronze bushings that were close at Lowes, cut off the flange, and made a little fixture to press them into place on the left frame rail.
We're getting closer, but with the master cylinder moved to the other side, the brake lines won't work any more. I found a good supplier (FedHill - www.fedhillusa.com) that sells British-style brake fittings and excellent brake tubing called Cunifer. They also sell and rent very nice flaring tool sets - way better than standard fare. After installing the master cylinder into the left frame rail, new lines are necessary to both the back and front of the car. Not a big task. Originally I rebuilt the master cylinder with a rebuild kit that was really expensive for a couple little rubber pieces. The rebuild didn't "take" as is often the case with old rusty cylinders, so I bought a new one - would have saved a lot of time and money by doing that right away rather than trying to redo the old one.
Speaking of getting the master cylinder out, the manual suggests that you remove the torsion bar to access the two bolts. This is a big job, but instead it works fine to use a pry bar to flex the torsion bar out of the way as you slide the bolts in and out.
Once the brake lines are run, it's not difficult to install the pedals that were designed for a LHD car. Things would be a little more complicated if you are using the original transmission since you would have to reroute the clutch arm in the bell-housing to the other side. But left-hand pedals are the easiest way to go if you are using a Datsun 5-speed since it only has provisions for the lever on the left.
The high-beam switch needs to be moved to the left side - this does require some wire extensions. And I had to make a little filler plate to go over where it was originally installed on the right of the car.
The front carpets also need to be replaced. They don't swap side to side, so if you don't get new carpets, you will be left with the heel-pad and holes for the original pedals still there on the right.
While switching from RHD to LHD wasn't a huge task, it was made a lot easier because I had the engine out of the car. I don't know if it could be done with it in place. In summary, there's nothing overwhelming about this job, but gather up all the pieces in advance, and be prepared for a lot of little challenges.
If you read about our 48-state trip with this car, you know that we spent a lot of time being cold. The original heater was noisy, then finally gave up the ghost. It turned out to be the wires rubbing against the fan, and finally they were torn loose. However, even after fixing the wiring, there was minimal heat output. Same in my other Woody. I've read where some folks fit later heaters, particularly from Mini's, but my local Mini expert tells me that even these can't be confused with heaters in modern cars. So I decided to try another path.
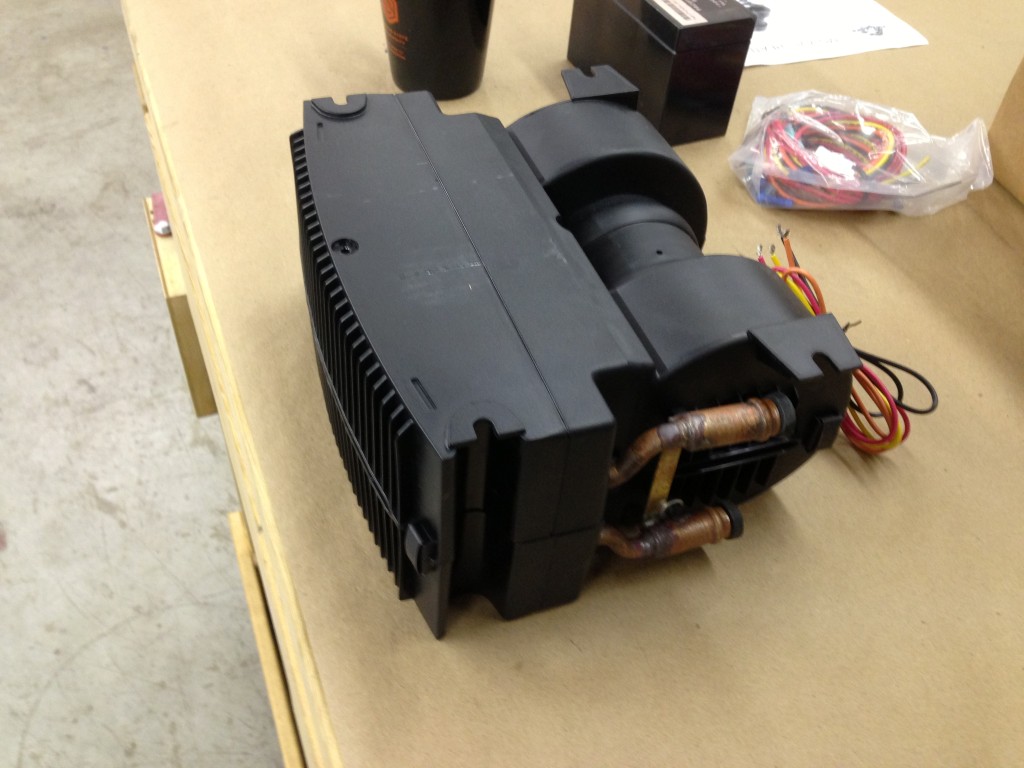
I read about an after-market heater that was a relatively close fit, called the Flex-A-Lite Mojave. However, there are no provisions for defroster vents unless you buy an extension, which would make it stick out too far in this application, and the defroster vents would also be too far in front of the dash. I emailed the factory (they are just south of Seattle) and they told me that it wasn't practical to add defrost provisions otherwise, not enough room. But when I saw a used unit (still in original box) on on eBay, I thought I might give it a shot anyway. Here's the heater...

You can see the picture on the lower left showing the optional defroster attachment. Also note that the water lines are coming out of the left rather than the right, as with the Morris. No problem here, just mount it upside-down.
Once out of the box (and upside down), here's what it looks like. There is a squirrel fan on each side of the back which sucks air from the sides and blows it out the front.
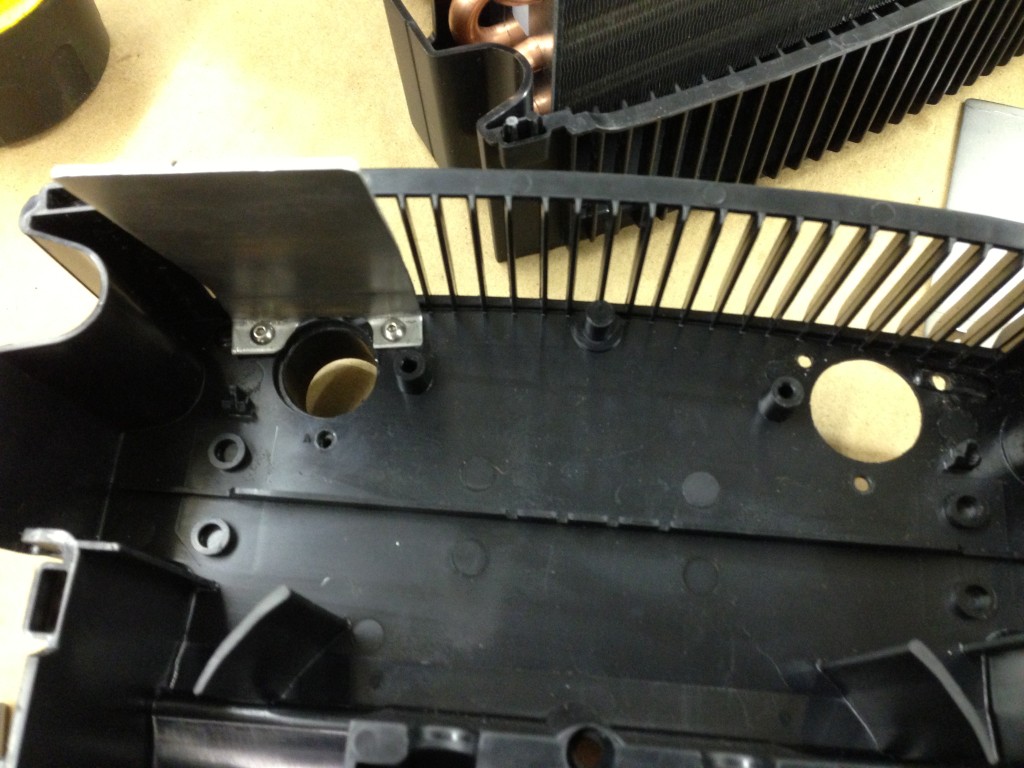
For the rear brace, I used some 3/4"x3/4"x1/8" angle iron. The outsides bolt to the top of the metal "shelves" under the dash on each side of the speedometer. The angle brackets in front bolt to two holes I drilled in the lip under the front of the dashboard. I used steel thick enough to drill and tap holes so that it isn't necessary to deal with nuts during installation. 1/4"-20 for the holes in the angle bracket and lower front brackets, and #10-24 for the two screws in front. I machined up some nozzles that bolt from inside the heater, and drilled some holes in the heater to match. The defroster hose used in the Morris is 1 1/4" inside diameter, and I found that inexpensive vacuum cleaner hose is available in that same ID. In addition to being too short, my old heater hoses were in rough shape, and were shored up with a lot of duct tape. Imagine that, someone actually using duct tape on ducts.
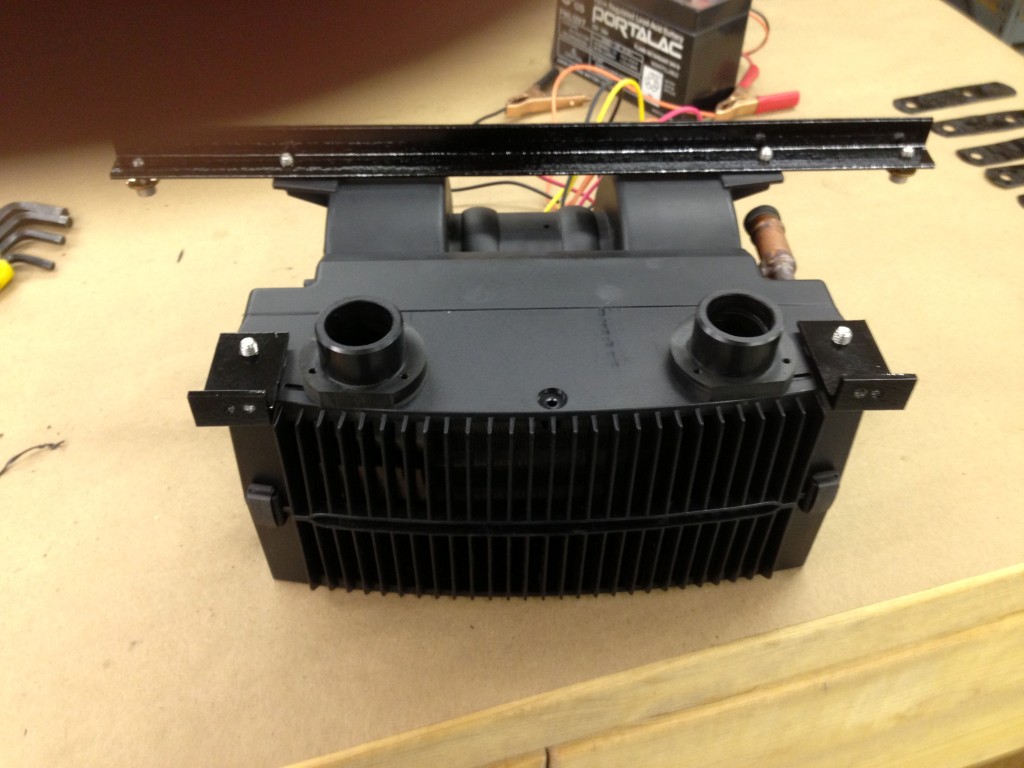
Inside the heater, a made a couple of baffles about 2" wide below each vent outlet. I bent them so that they angle in at the bottom, so air wants to follow them up and out the defroster outlets.

The deflector plate might be a little easier to see in this shot...
The next task is wiring. I decided to install a 4-pin connector between the heater and the car, that will make it easier to remove later on, if necessary. I drilled a hole in the dash (gasp) for the three-speed fan control knob. I might point out that Flex-A-Lite includes absolutely first-class wiring with the heater. Lots of nice heavy color-coded wire and all the connectors that you need. In addition, the fan speed control is via different windings in the fan motor. Most heaters (like the original Morris) use power-dropping resistors to control the speed. That means that you are generating a lot of wasted heat in the resistors that are then failure prone and can't be near other components - the Flex-A-Lite solution is much better.
When I was doing the wiring, I also took that chance to clean up some of the other wiring under the dash. When I later turned in the ignition, I found that hardly anything worked any more. I spent a lot of time checking my wiring, only to find out that the problem was completely unrelated to my changes. One of the terminals on the fuse block had corroded.
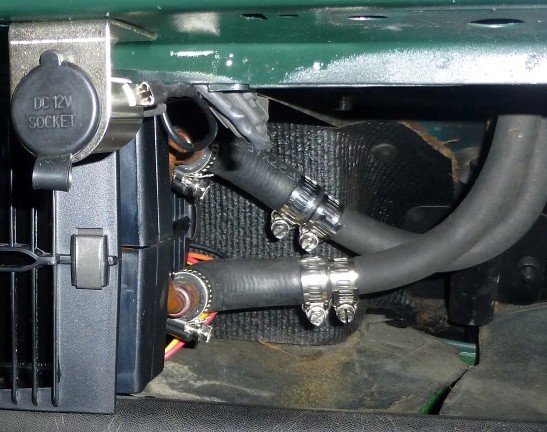
Final step is the hot-water plumbing. The heater is made for 5/8" hose, and heads straight to the firewall. The Morris has 1/2" hose. I found a 5/8" inch heater hose that was preformed with a couple of bends, then cut out the bends and used them to connect to the heater, angling to the right. Then I made a couple reducers to convert from 5/8" to 1/2" to match the Morris hoses. Lots of hose clamps, but it doesn't leak and they are easy to get to.
The package tray had to be flexed a little to fit under the heater. That wouldn't have been the case on my other Morris since it's tray isn't as deep. Rather than drill a couple of new holes a little lower (maybe 1/2") for the package tray, I let it press against the bottom of the heater, this should help eliminate any potential for rattling or squeaking.
Here's what the completed installation looks like. The knob to the right of the speedo controls the fan.
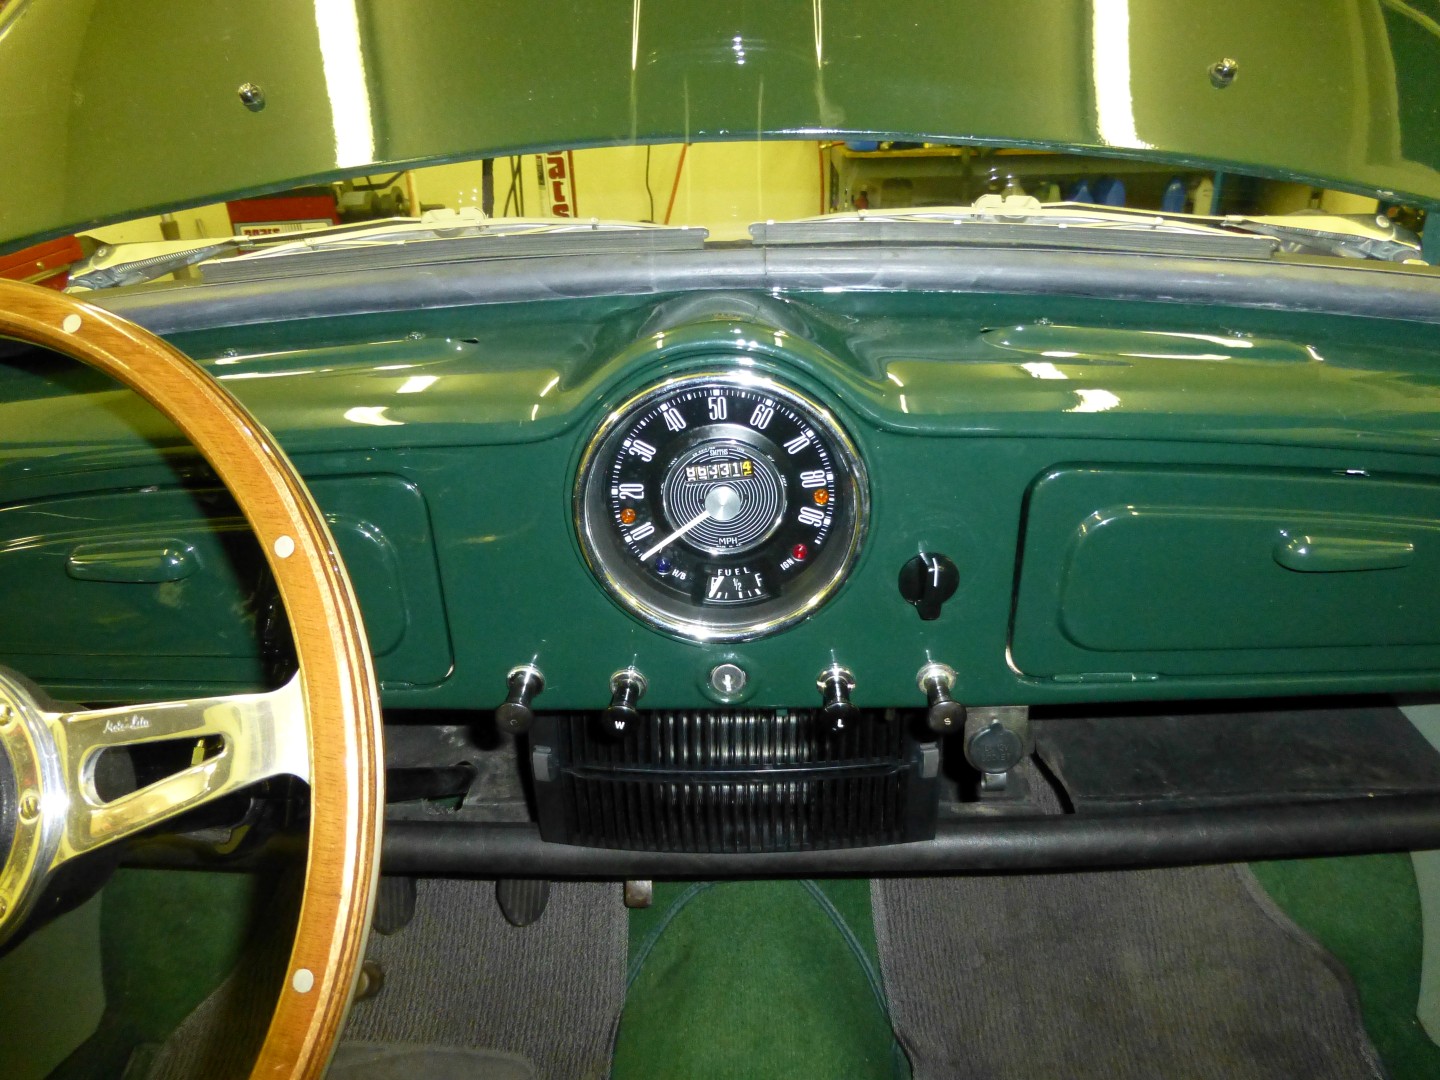
But the important question is, how does it work? Well, I've been comfortably warm in a Morris for the first time on a cold day! It's WAY better than the stock heater. When I first fired up the car to test it, there was more warm air coming out after three or four minutes, than the original heater had ever put out, even with the motor fully warmed up. I do think that the deflector plates I made for the defroster are a little too small though. I can feel warm air coming out of the vents, but I'd like to see more. I haven't tried it yet when I really need defrosting, but I have a gut feel that a little more will be necessary. It's also fairly quiet. On the first two speeds you don't much hear it over the Morris engine sound, but you can on high speed. No louder than the original though. And with all this heat output, high isn't necessary except on the coldest days. High was always necessary with the original heater, but "high" on the stock heater put out a lot less heat than low speed on this unit..
This was quite a bit of work, I probably whiled away a couple of days tinkering on the conversion, but it would be faster next time now that I've figured out how to do it. It did require removal of the glove-boxes, package tray, and speedometer to get working room.
Every time I work on the Morris, I learn a few new things. Here are some miscellaneous odds and ends that you might find helpful if you work on your Morris.
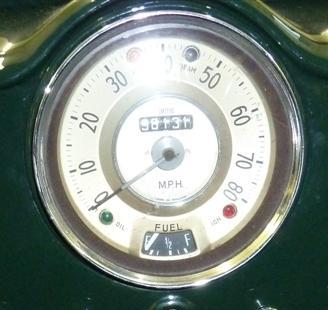
This is the speedometer as I got my car from England. From what I hear, it is common over there to build cars for export with whatever parts that they have laying around. In this case, it has a gold speedometer, and a black fuel gauge. The two shouldn't be mixed. I ran out of gas in the car before I investigated.
Every time I put in new front wheel bearings, I scratch my head about the orientation. I've done it wrong before. So this is to refresh my memory in the future, and maybe yours too.
The bearings have different distance between the inner and outer race on each edge. The correct way to install them is with the thinner space facing the center of the hub, like this...
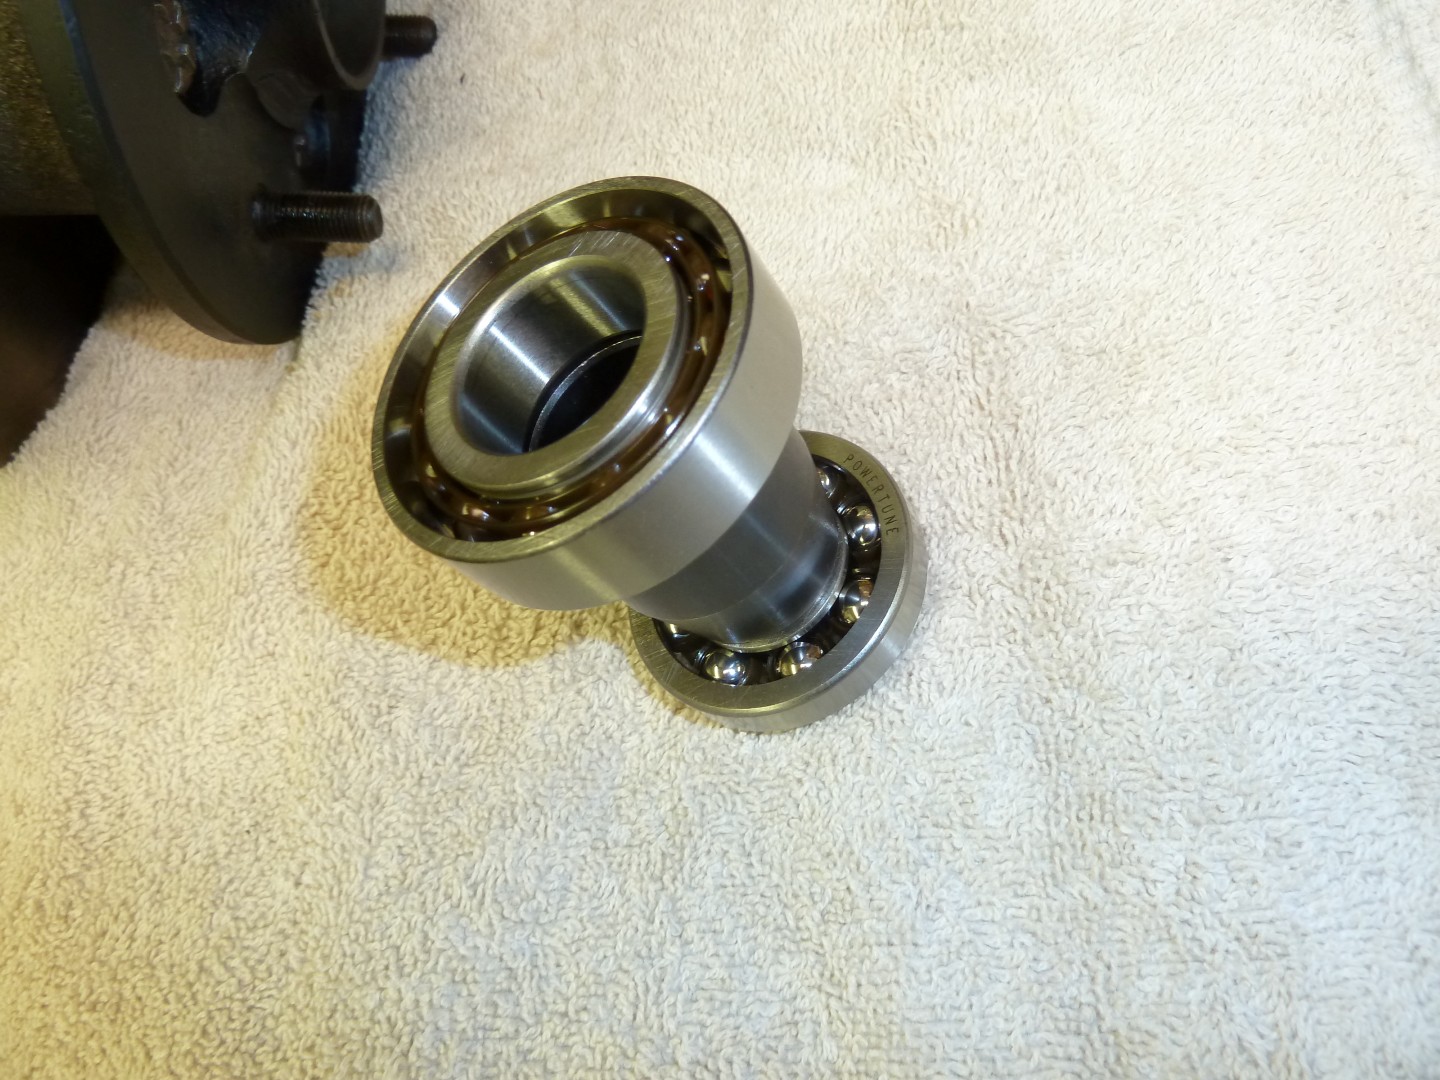
The outer bearing is shown at the bottom of this picture.
The first time I wanted to pull my speedometer, I thought it was going to require removing the glove boxes, and who knows what else. Then I discovered that the Morris folks thought of us! Inside each glove box, there's an access hole. Put your Phillips screwdriver through that hole, wiggle it around until you find the screw head, than back it out a few turns. Repeat on the other side, and the speedometer slides right out!

Hope you've found something in these ramblings to be of some interest.