
Stock Model-A brakes are very marginal in their ability to bring the car to a stop in a timely fashion. Back in the 20's and 30's, traffic didn't hum along bumper to bumper at the speeds we are used to now. So, in a continuing effort to make my Model-A safe and usable in today's environment, I decided to switch over to hydraulic brakes. While this has been a modification that has been done countless times through the years, it is sparsely documented on the web. I hate to say it, but it might be that the typical person who did this modification is a little old to be with us, or maybe didn't move over into the computer age to document it.
Web-surfing provided some initial data about this change: the target brakes are the first series of hydraulic brakes offered by Ford. This series began in the '39 model year, and ended in '48. Ford didn't make cars for the consumer during WWII, so the '42-45 production years are missing. These brakes are all similar, with the same diameter (12") and width (1 3/4") drums - much larger than the original Model-A brakes. Unfortunately, these "new" brakes are at least sixty years old now, so you aren't going to run down to the local junk yard and easily score a set of donor parts. I started looking for parts. Between people I knew and swap meets, I came up with some backing plates and various conversion parts, but not the major pieces. These came from a CraigsList ad in Tucumcari New Mexico. He had most of the pieces I needed and was willing to put them into a crate for me. I checking into UPS/FedEx ground rates, and found that the cost based on estimated weight (about 100 lbs) wasn't horrible. So after paying him, and waiting for him to do the crating, I get a report back that it's 180 lbs - more than UPS or FedEx will haul, so it will need to be trucked, more than doubling the shipping cost and approaching the cost of the parts themselves.
Well, some things go smoothly, and some don't, and I didn't know where else to turn. You can buy just about all the parts you need new from various suppliers, but once you start adding up the prices, you are looking at $2,000 or more, and you still need to ship them. Somewhat offsetting this purchase, however, I bought a box of brand new adaptor parts at a swap meet for a buck, and got some other parts for free. It made me a little nervous that all the parts I had acquired were from people who were going to do a Model-A conversion, but didn't. Is this going to an overwhelming job?
Along the way, I ran across a book that tells all the details about how to perform this change. It's by Les Andrews, and is called "Model A Ford Mechanics Handbook II". It's available from Cottage Hill Publishing in Grass Valley, California. Call 530-268-3018 to order. If you're going to make this change, I would consider this book to be an absolute must-have. Even after reading this description of the job on my web site, you will still want to have Les' book for detailed information, such as dimensions for holes and parts lists. I'm just going to give you an overview of what needs to be done. I had a little trouble initially figuring out the big picture, so maybe this will be of some help for you.
To make the change, it's necessary to round up a complete set of brake backing plates, hubs, and drums from a '39-48 Ford. If you are running wire wheels on your A, the '39 drums won't work (but the '39 backing plates will). Those are the major parts, but in addition, you will need a master cylinder and various hoses and fittings. The only difference on the backing plates during this series is that on the early years ('39-41), the lower shoe pivots can be adjusted. As a result, slightly different shoes are used (early had round pivot hole, late had oblong pivot hole). There are subtle differences in the drums through these years, but they are functionally the same.
So, do you just bolt these new parts on, and you're ready to roll? Not exactly. Here's some more detail about changes necessary.
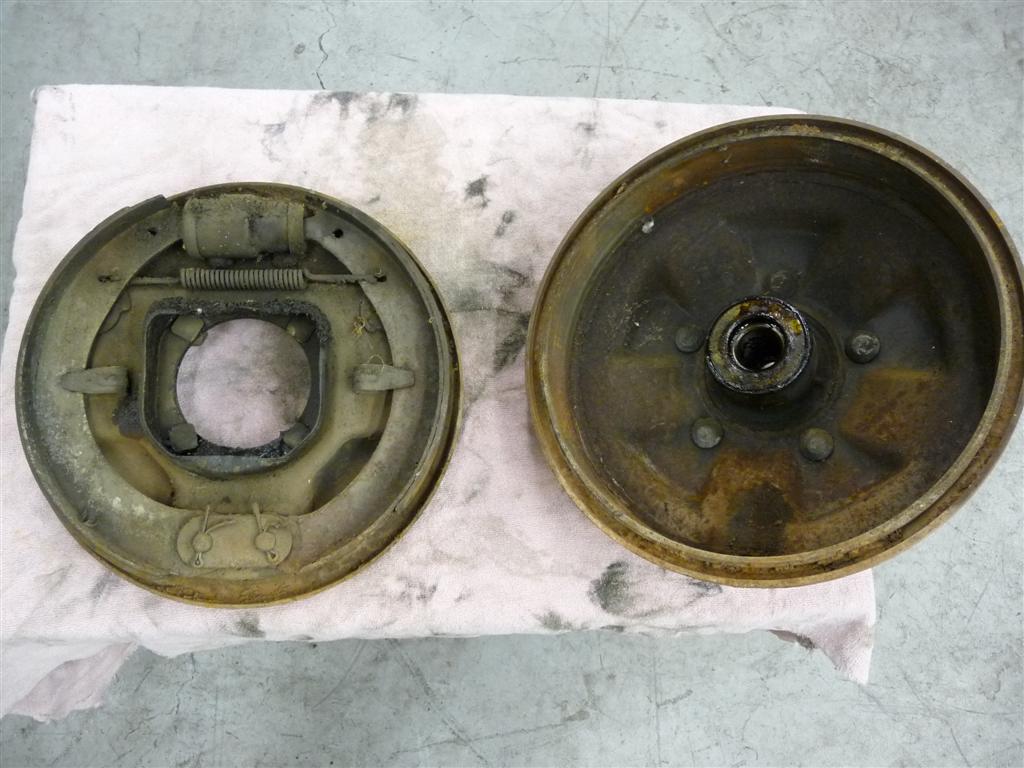
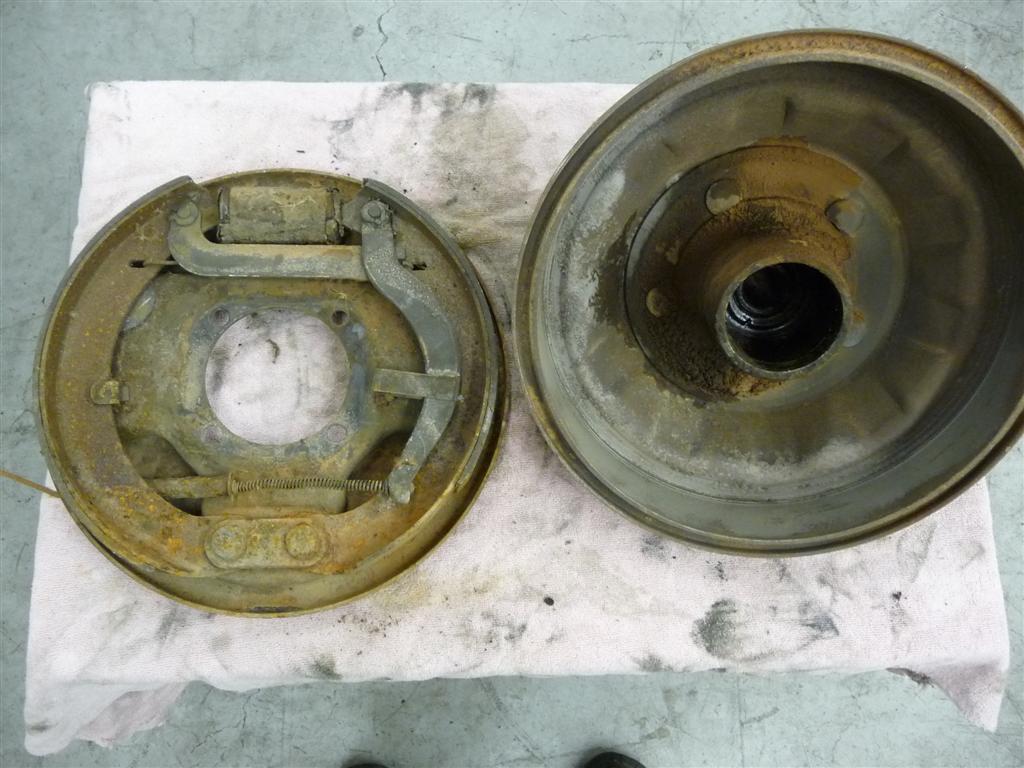
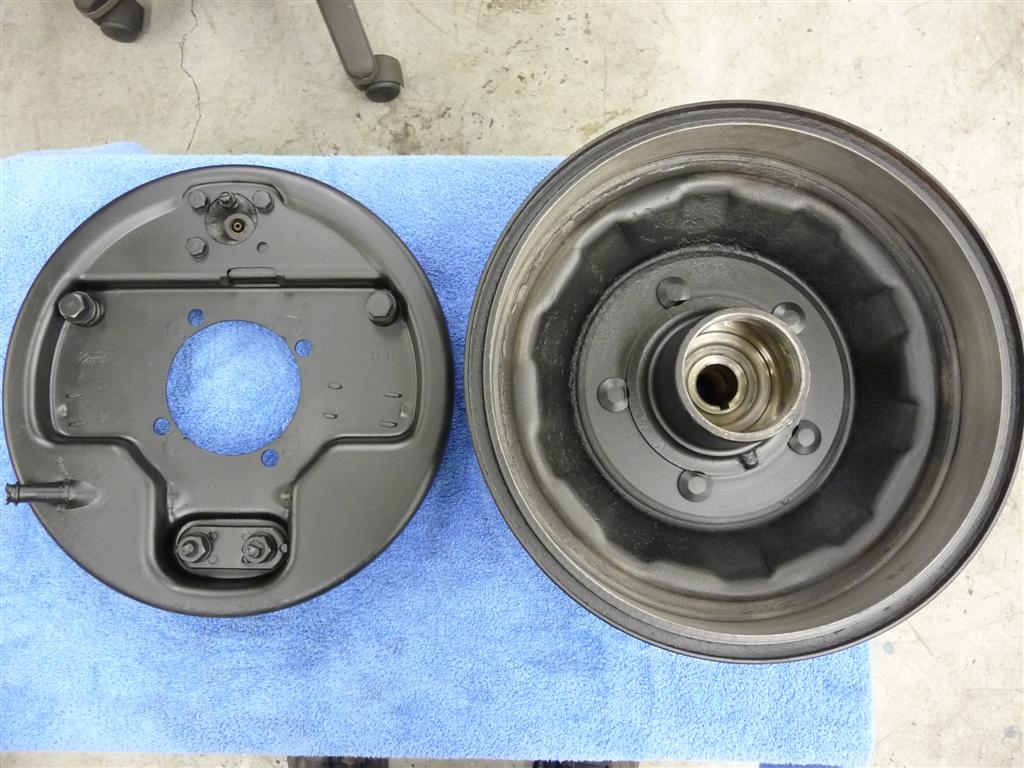
This is what the donor front brakes looked like when I got them. These are from a '46-48 car since they have the simple pivot in the bottom for the brake shoes.

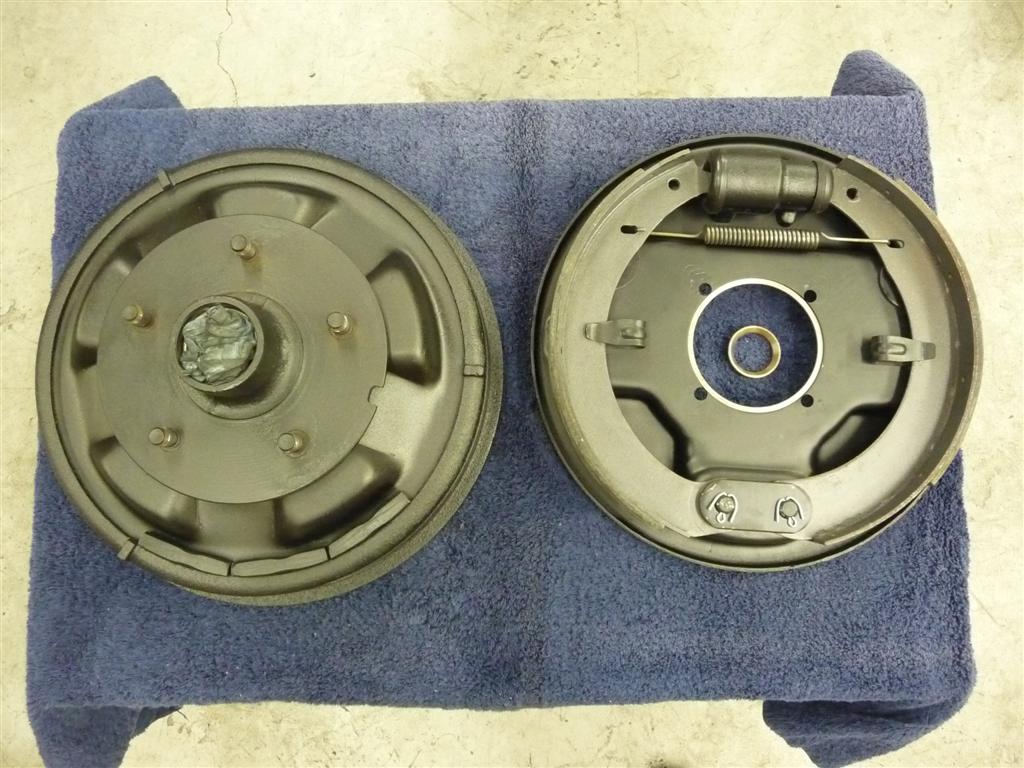
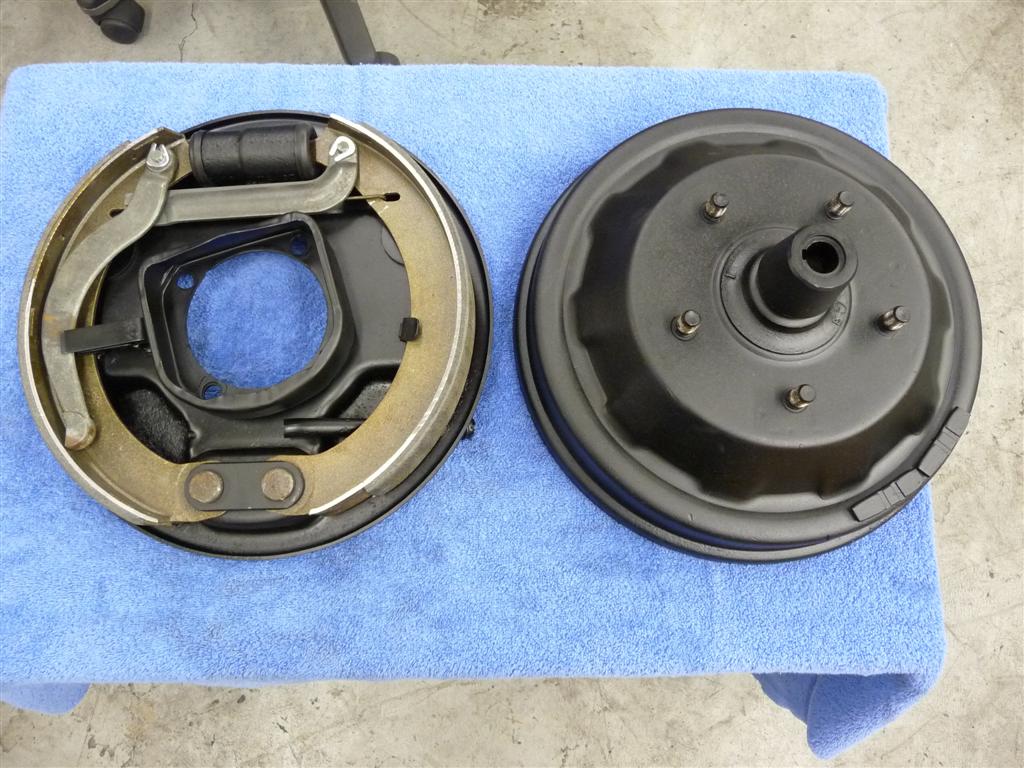
Modifications necessary are welding plugs into the original four 1/2" mounting holes in the backing plate, then, drilling new 3/8" holes on a smaller bolt circle. The suppliers of conversion parts (e.g., Clings, MT, Sacramento Vintage Ford) sell a ring that reduces the inside diameter of the backing plate hole for mounting - this forces the alignment to be just right, rather than relying on the four bolts for centering. Another part that is required is a spacer that is slid over the axle prior to installing the hub. This moves the hub out slightly so there is enough space for the wider shoes. Even with the spacer, it is necessary to sand a chamfer on the outside edge of the shoes to give a tad more clearance. Here's what the modified and rebuilt front brakes look like, you can see the two spacers on the right part of the picture.
It's interesting that these slave cylinders have a different diameter piston on each end, I hadn't run across that before. Evidently it was an attempt to direct more force to the front shoe, which is the self-actuating one. A further attempt to change the balance was by making the lining shorter on the rear shoe of each hub. In the front, the slave cylinders are 1 3/8" x 1" diameter (1 1/4" x 1" in early cars), and in the rear they are 1 1/4" by 1" diameter. The master cylinder that came with these brakes has a 1" diameter piston.
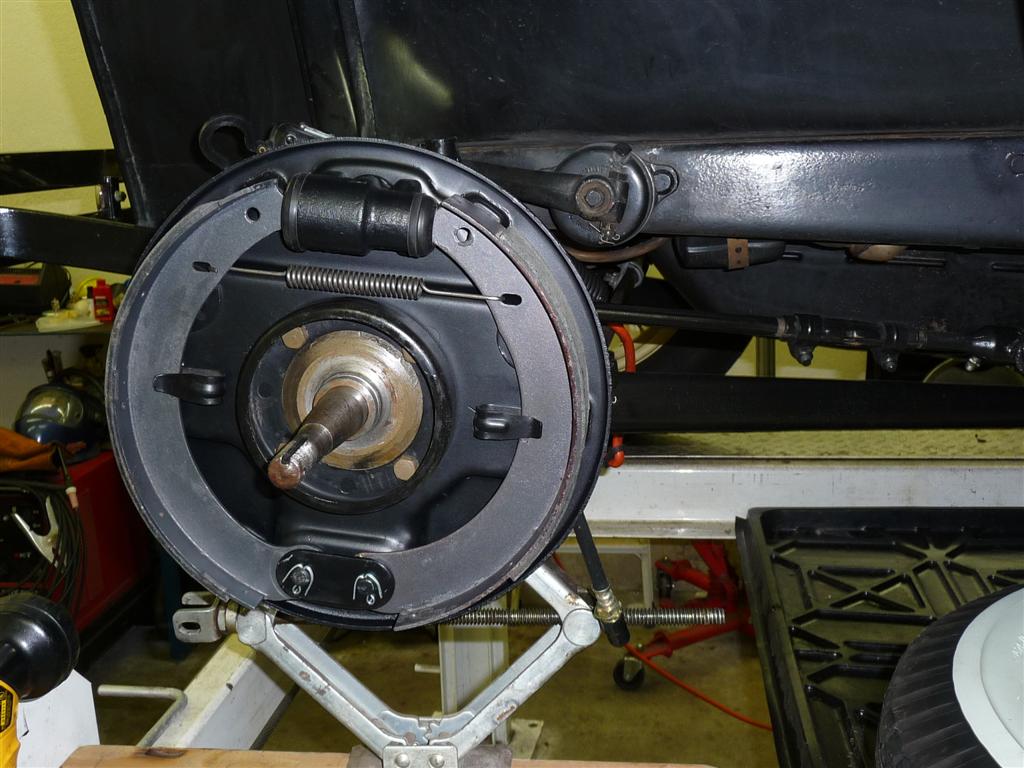
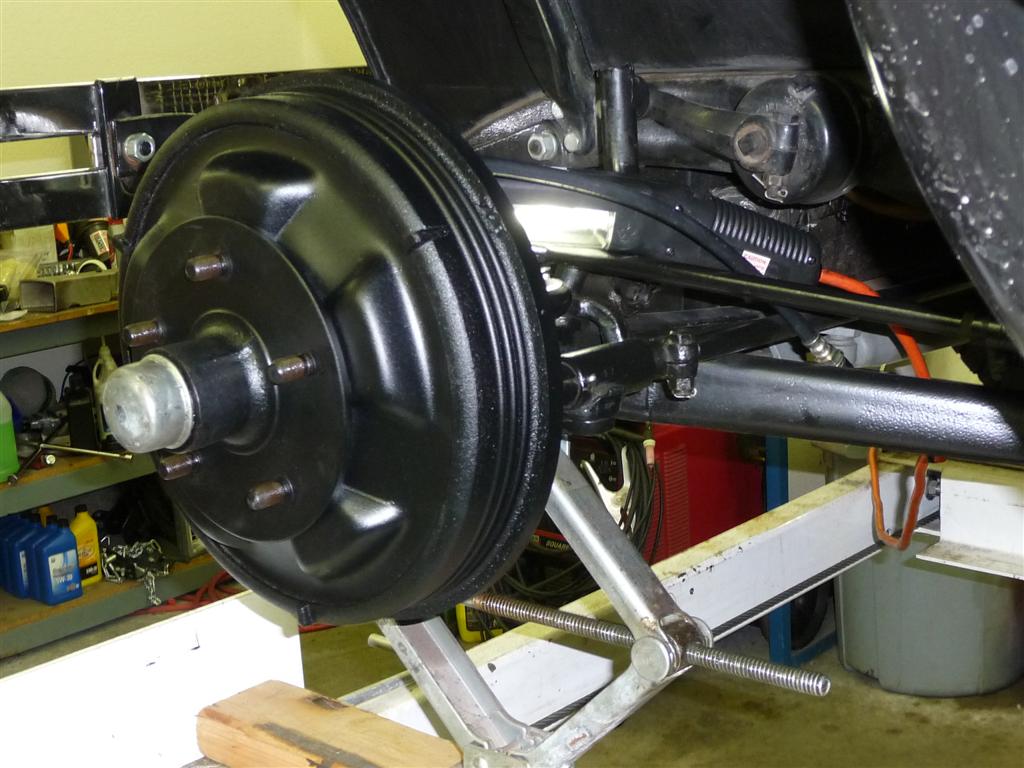
Here are the front brakes, mounted on the car...
A couple of the drums (one front, one rear) had balancing weights installed. I could see that these would interfere with the hubs on the 19" wire wheels of my car, so I removed them. It's not like a Model-A is going to be shooting along at supersonic speeds, needing these weights.
Here are the rear brakes as I got them. These are the earlier '39-41 style, as evidenced by the bottom shoe pivots being adjustable.

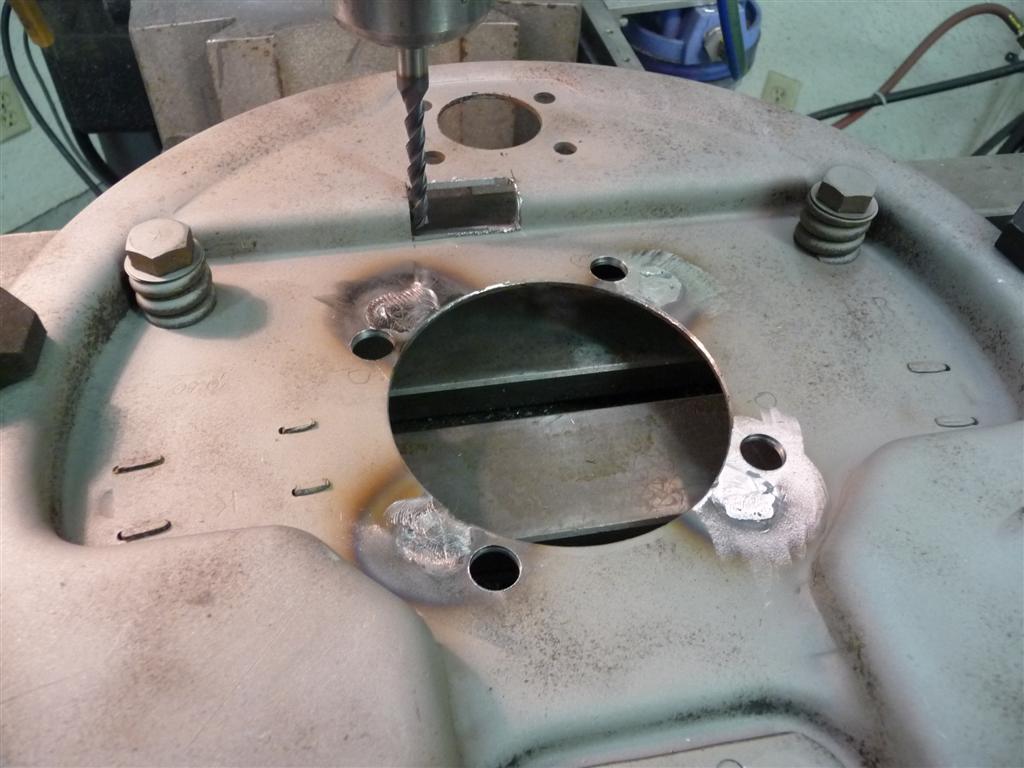
The rears require more modification than the front brakes. The big problem is that the slave cylinder and the end of the rear spring want to be in the same place. I read that one solution to this is to run the backing plates upside down so that the slave cylinders are at the bottom. This seems OK to me except that the bleeder screws are then lower than the pistons - it must be really tough to bleed them effectively (Note: see my "next time" notes at the end - I've revised this thought). So the solution that most people take is to redrill the backing plate mounting holes so that the backing plates are rotated about 15 degrees. This moves the slave cylinders to be in front of the spring. Also, for spring clearance, a little hole needs to be machined or ground into the backing plate. You can obtain a cover for the hole from suppliers I have previously mentioned. Here's the left one as I modify it:
After the mounting holes are plugged (optional) and redrilled, and the clearance relief for the spring are made, it's time to deal with the shoe width problem. Since the rear wheels are mounted on a tapered shaft, you can't move them out with a spacer as in the front. So it's necessary to allow them to run closer together. First, the rib around the outside edge of the backing plate is ground or machined down about 1/8" so that the drum can fit closer to the backing plate. Then, the inner ridge of the drum needs to be trimmed down a like amount for the same reason. Finally, the shoes are made a little narrower (about 1/16" on the outside) and the edge chamfered. When bolting the rear backing plates on, the original Model-A bolts will bottom out before tightening if you don't use a spacer on the bolts. These spacers are available from the various suppliers. The grease retainer boxes (sheet metal in the center of the brakes) from the '39-'48 brakes are used in the rear, while the Model-A grease retainer boxes are used on the front.
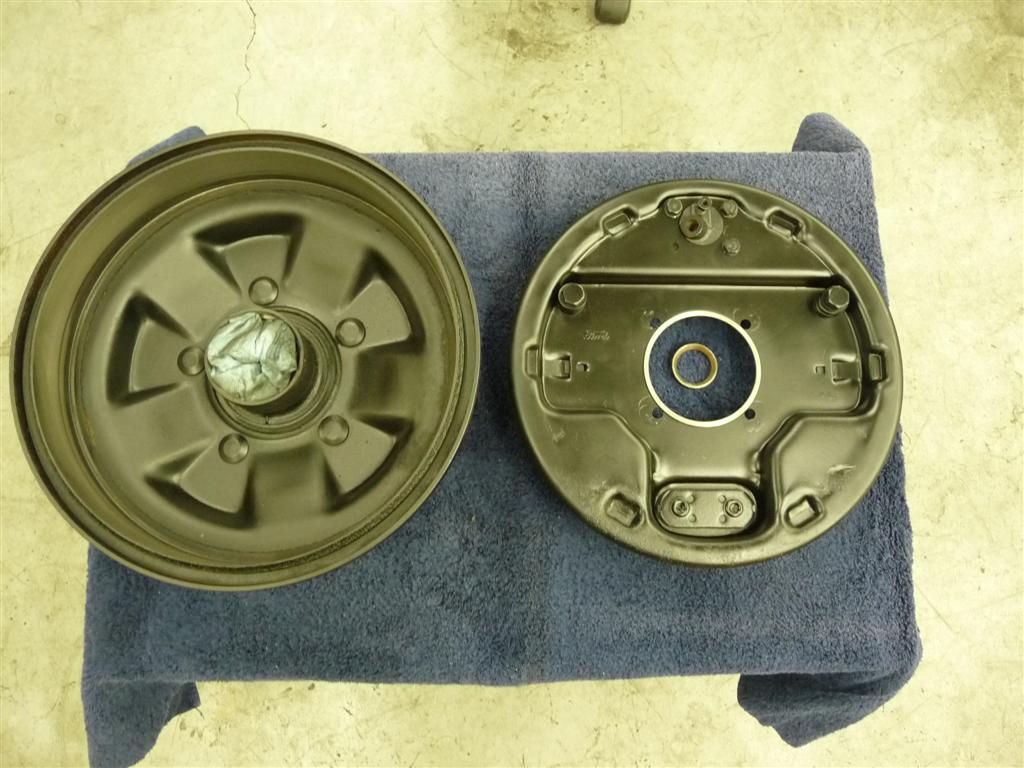
Here's what the rears look like after refurbishing and modifications are made:
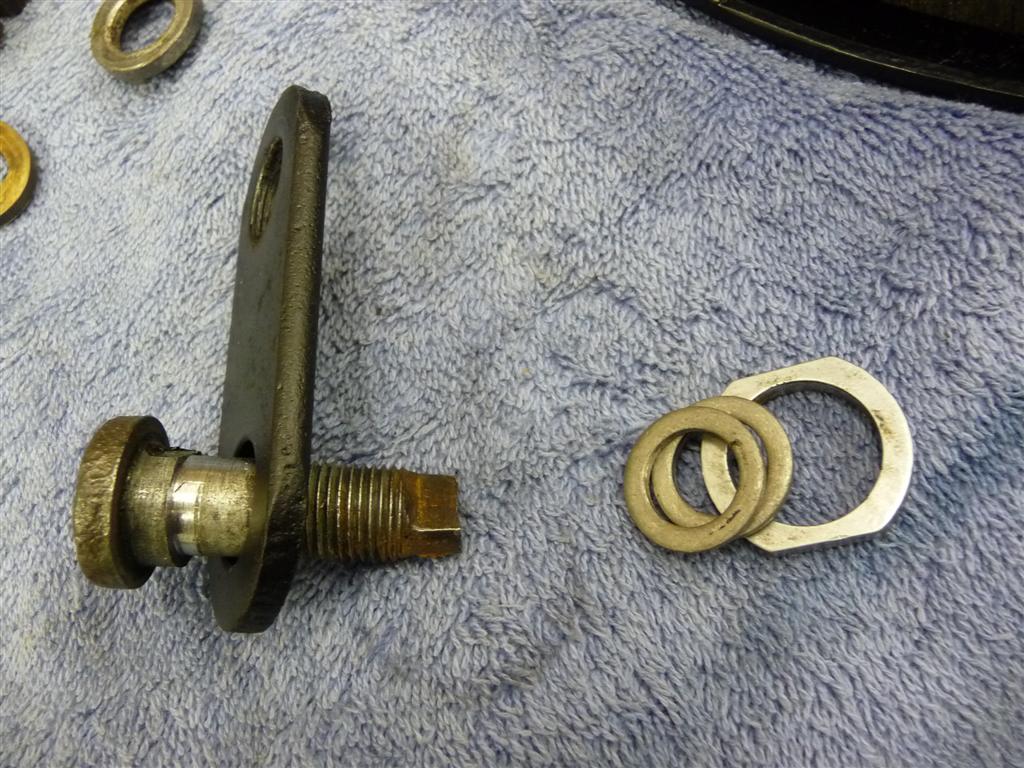
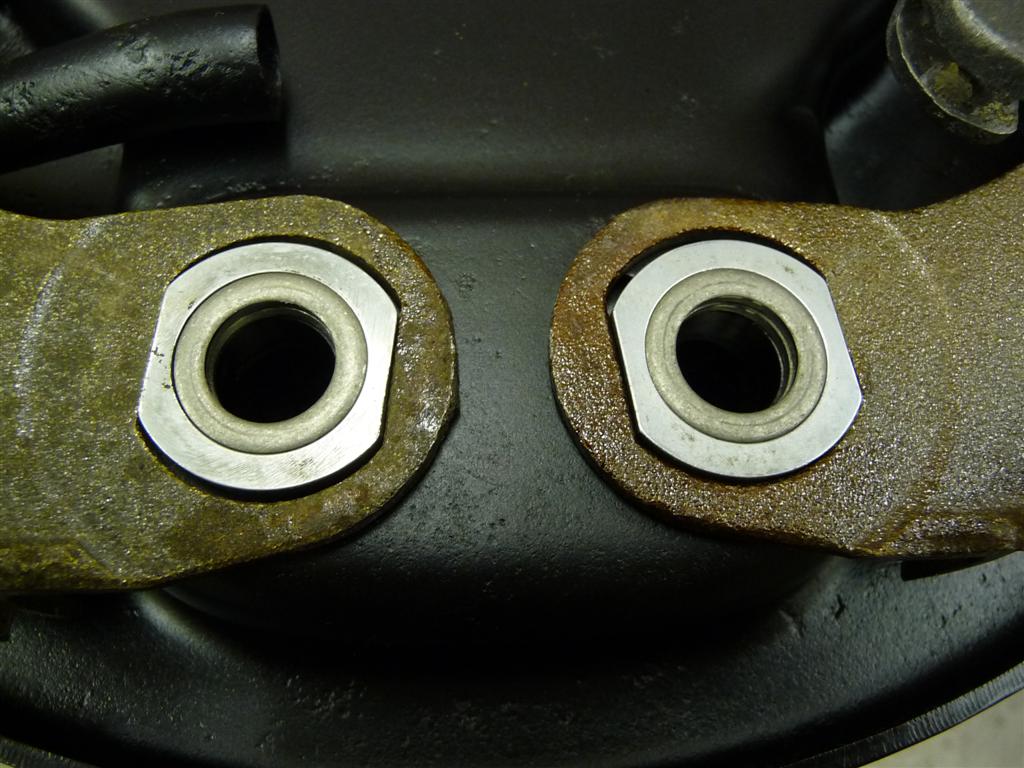
Part of the package of parts from Tucumcari was a new set of brake shoes. Unfortunately, all the brake shoes were for the late style brakes, but my rears were the early style. Rather than buy new shoes, I made a little modification to make the late shoes work with the early backing plates. This involves turning the ridge down a little on each bolt, then using the later style oval pivot washers in conjunction with some washers (.50" ID, .75" OD, .180" thick) that I got from McMaster Carr. Much cheaper than replacing the shoes, and it eliminates the need to make the lower adjustment.
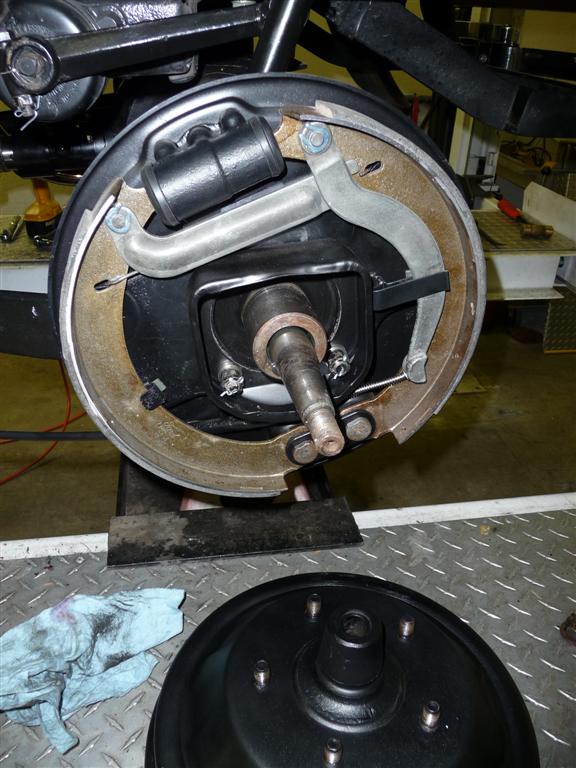
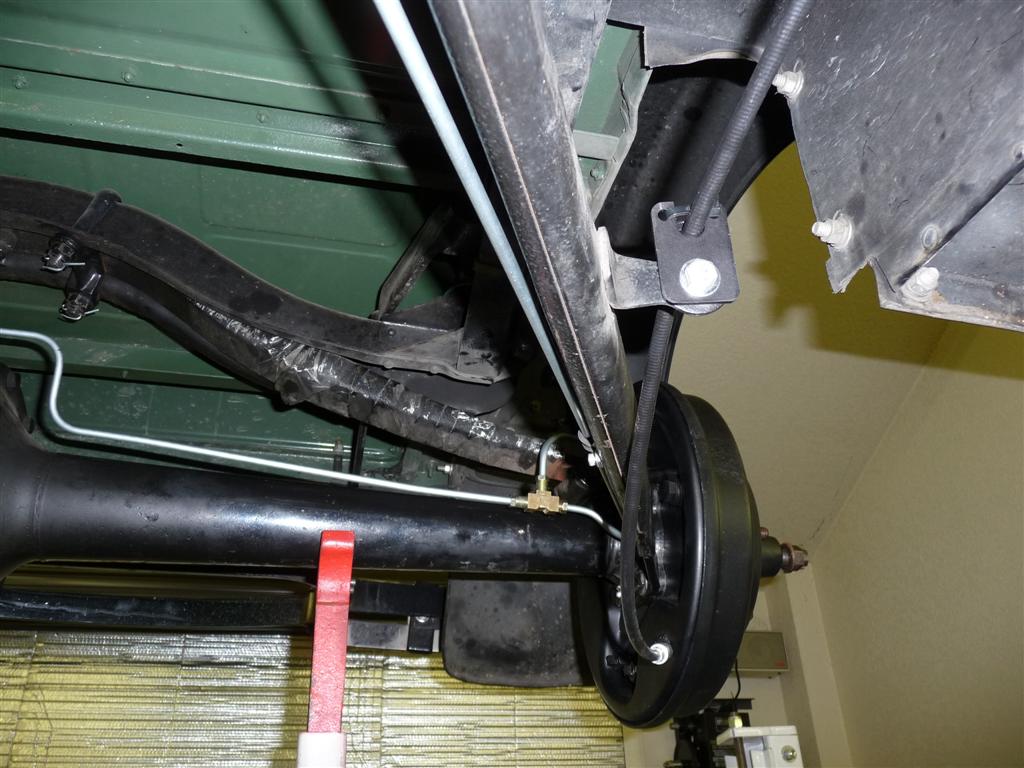
Here's what the rears look like when mounted on the car...
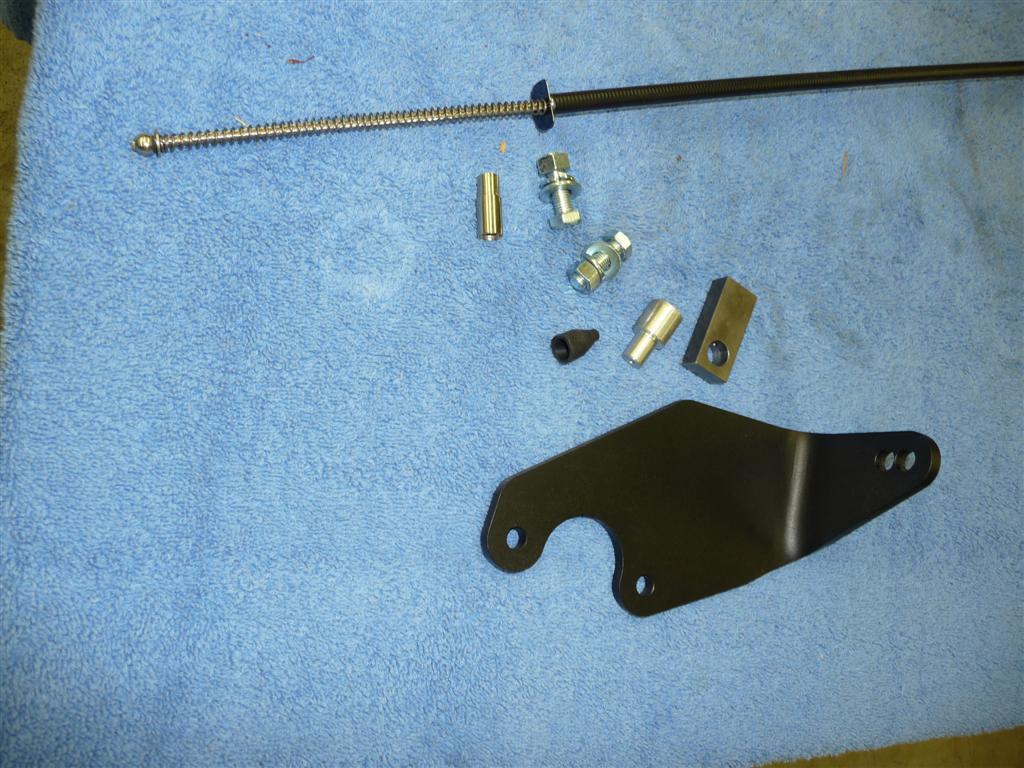
Since the original Model-A brakes are operated with a rod, and these brakes want to work with a cable, some changes are necessary. I bought a kit from Cling's Aftermarket Parts to accommodate this.
The kit is nicely made. Here's what the parts look like for each side:
You bolt these to where the original emergency brake cross shaft is bolted, so some of the mechanism is as original. When installed, the front looks like this:
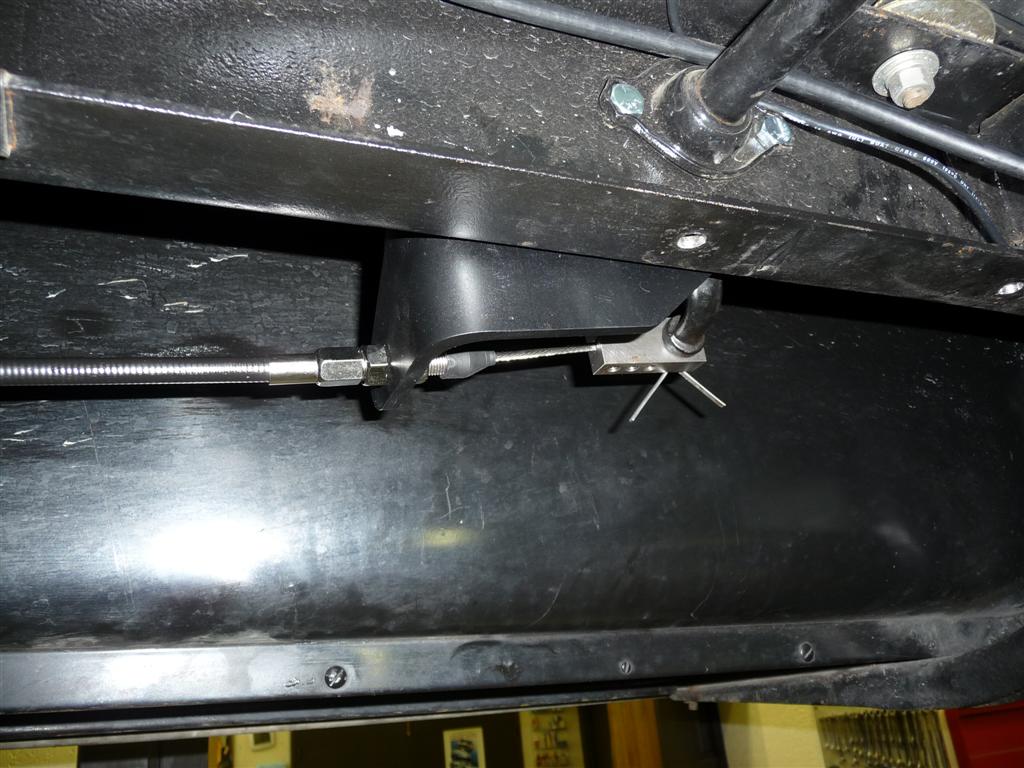
To keep the cable out of the way, I made little brackets that hold the cable to the original anti-rattle brackets for the rods: I took this picture after the hydraulic system was run, oops, ignore that for now, we will get to it soon.
Now it's time to think about the master cylinder. I ordered up a '39-'48 Ford original master cylinder. It looks like this:
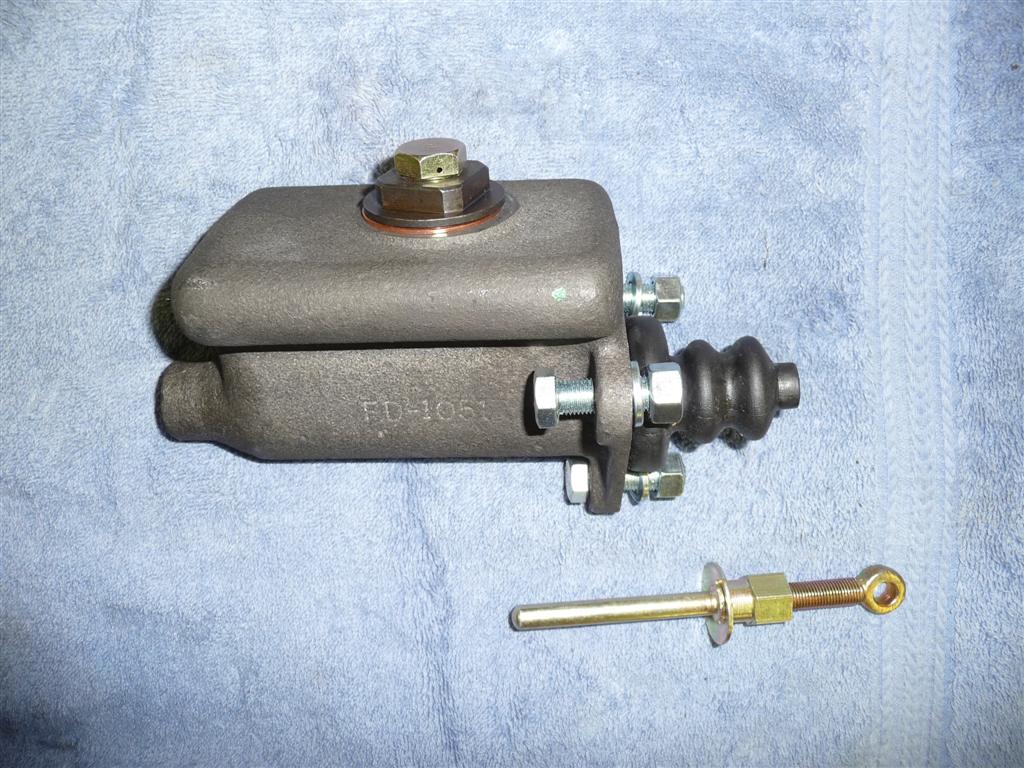
Then I started searching under the car for where I was going to put it. Since I had installed a T5 transmission, there's no room to put it beside the transmission, such as with a kit you can buy from Cling's. So there were three problems I could see: (1) it's really big, (2) since I was destined to have it to the rear of the transmission to make room, it would be very difficult to have access to filling it, and (3) the rod from the pedal wanted to be pulling, while the master cylinder rod wanted to be pushed.
So I decided that I would go a little different direction. I had used a Tilton master cylinder on my 240Z V8 project for the clutch, and was impressed with the size, quality, and price (well under a hundred bucks with multiple reservoirs, fittings, etc). They also allow you to remotely mount the reservoir. So this took care of two of the problems: size and access to the reservoir. I ordered one with a 1 1/8" bore. I figured it wouldn't hurt to make it a little larger. I could always go smaller if the pedal pressure was too much. Note: looking back, I think a 1" bore would have been fine.
Now, how to reverse the direction? I decided to mount it under the driver's butt, bolted to the cross member. So I made a little lever arrangement to reverse the direction. It's a 1:1 ratio on the lever arm:
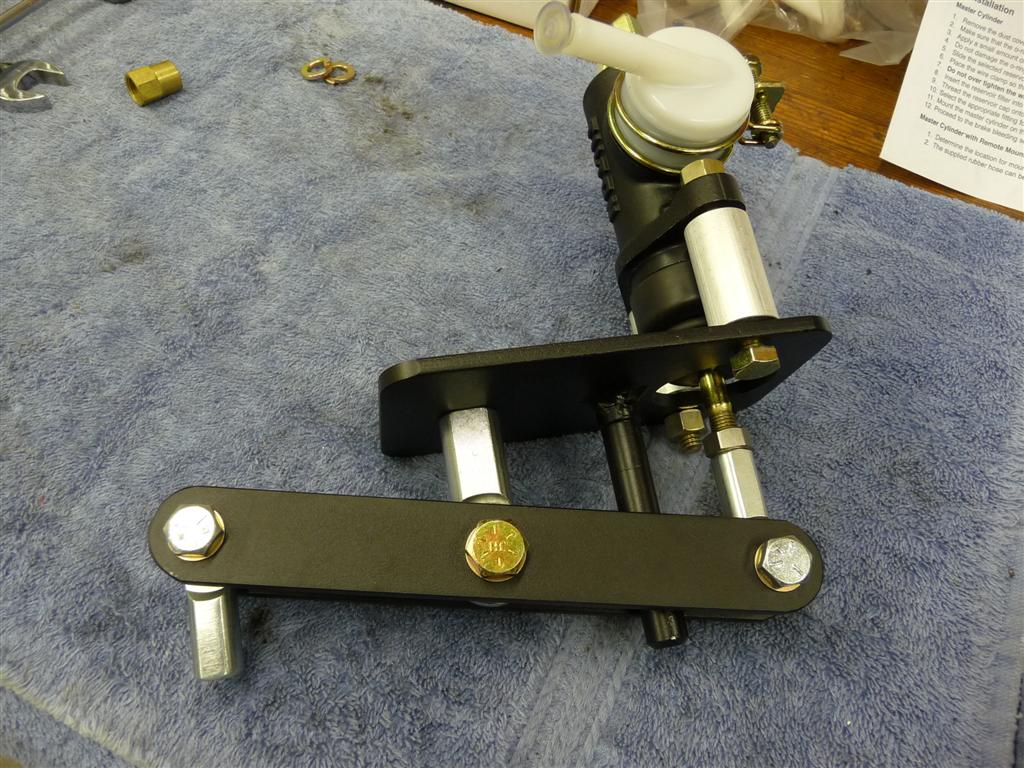

The little black post you see is just to keep the lever arm from rotating too far. I figured that the center Heim joint gave a little too much movement, and potentially the rod going into the cylinder might get cocked.
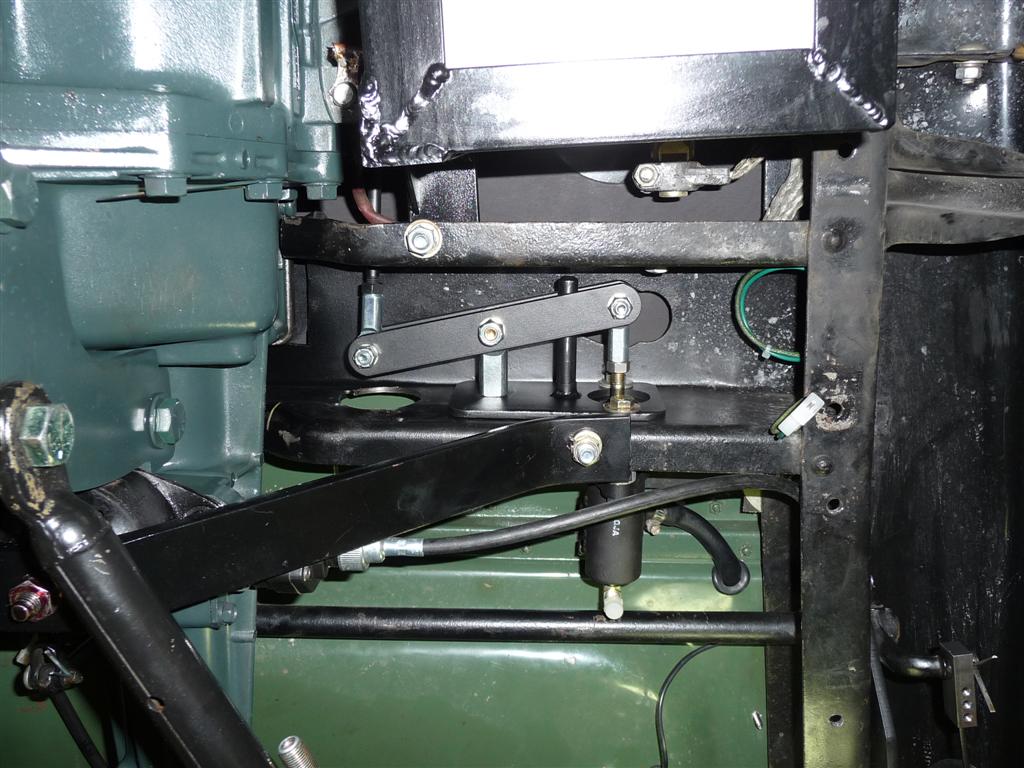
Here's what it looks like installed in the car. The front of the car is to the top of the picture. You can also see the hose going off to the remote reservoir.
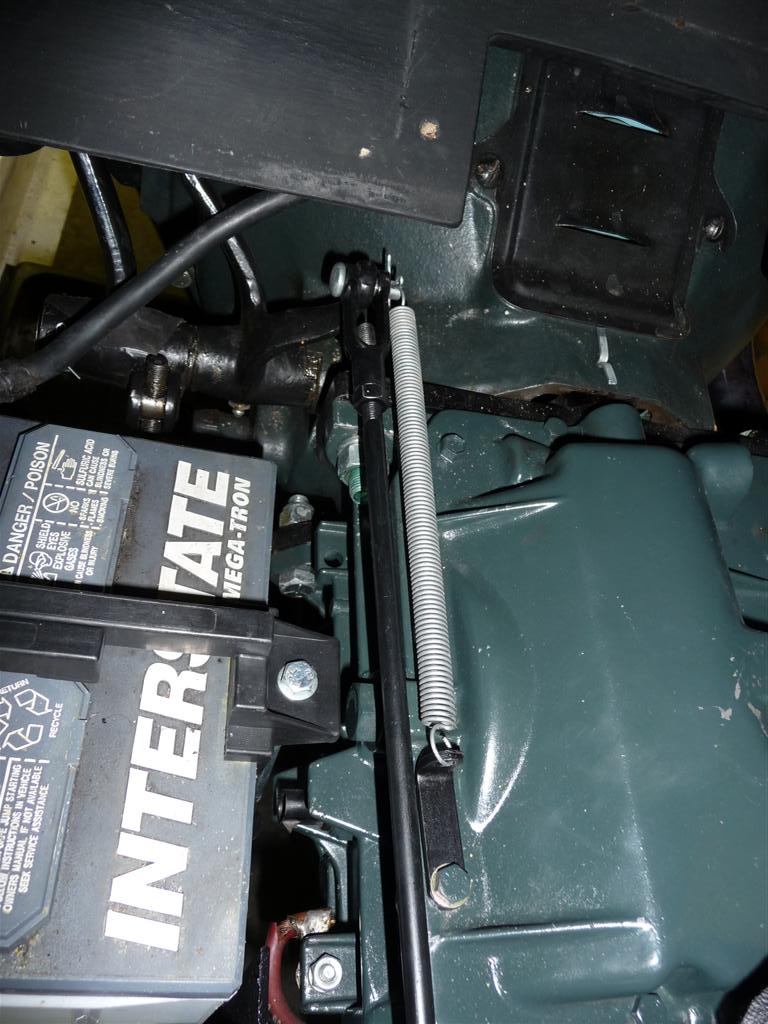
There wasn't quite enough return spring in the cylinder, so I made a little angle bracket on the transmission, and installed another spring.
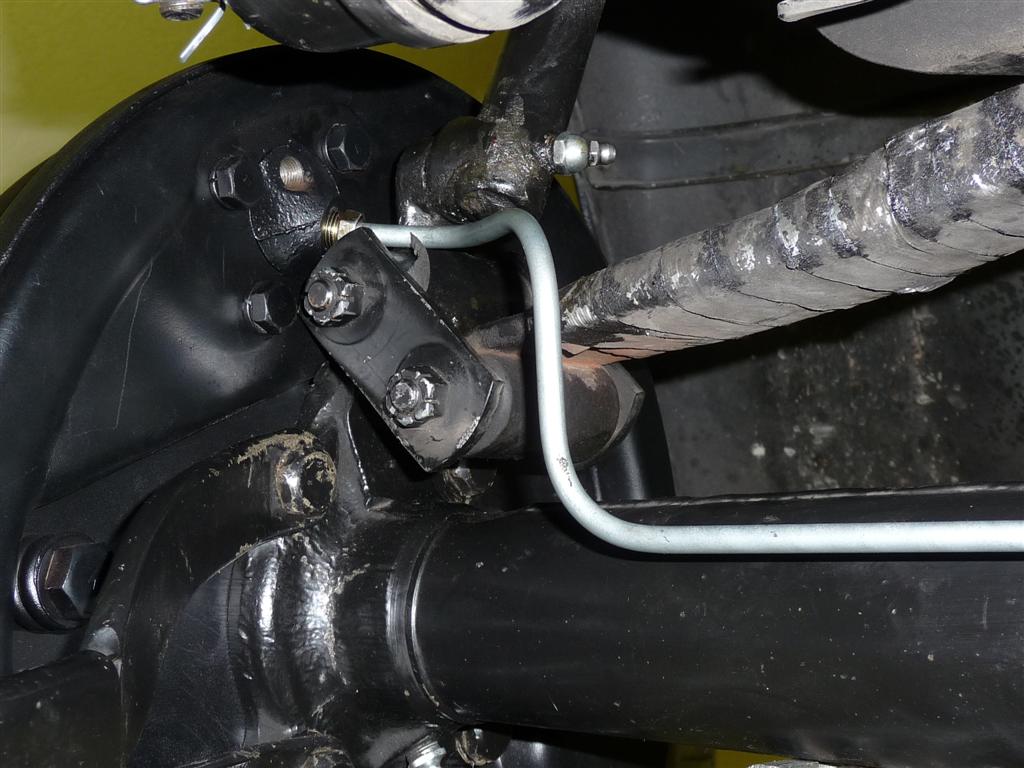
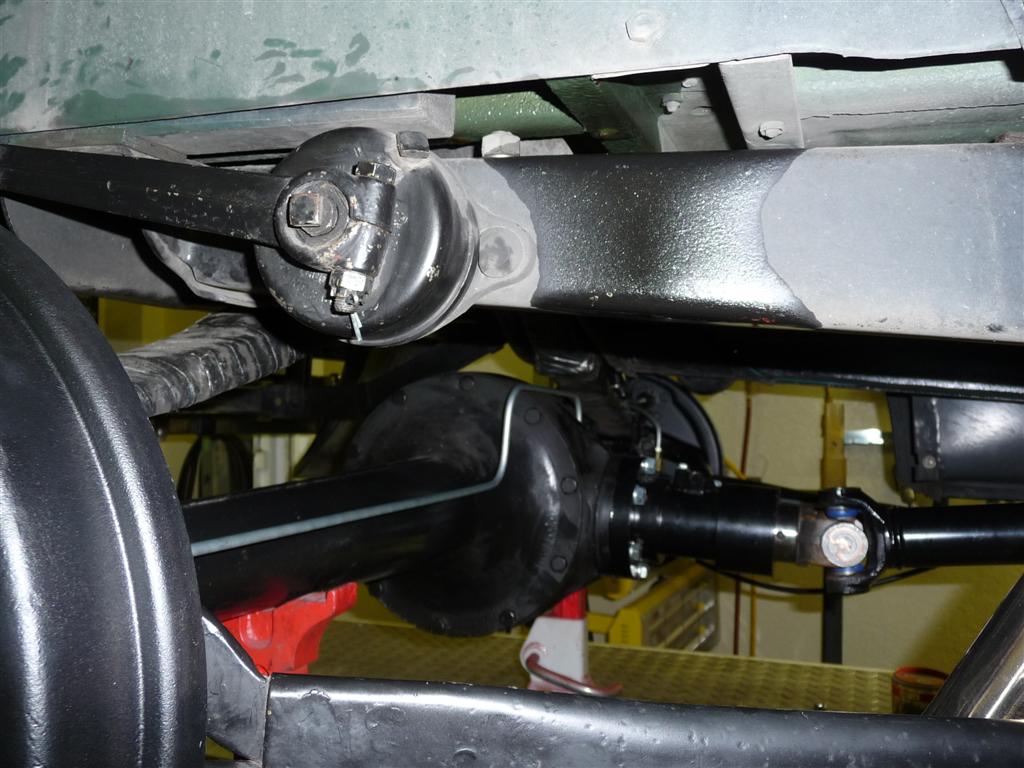
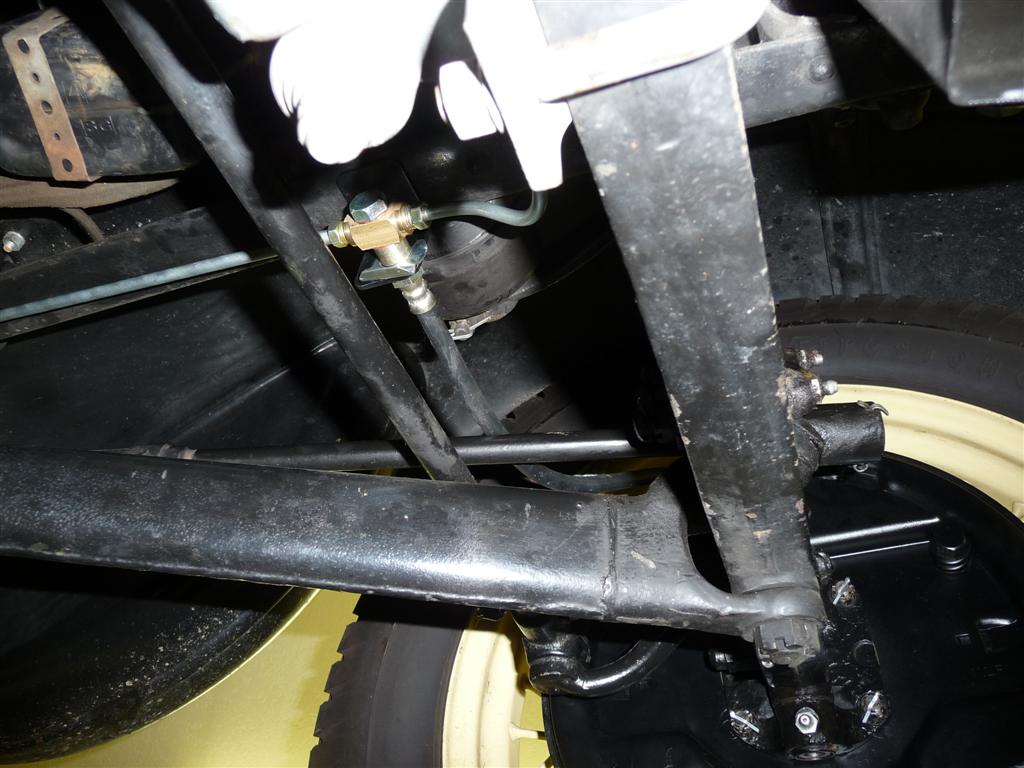
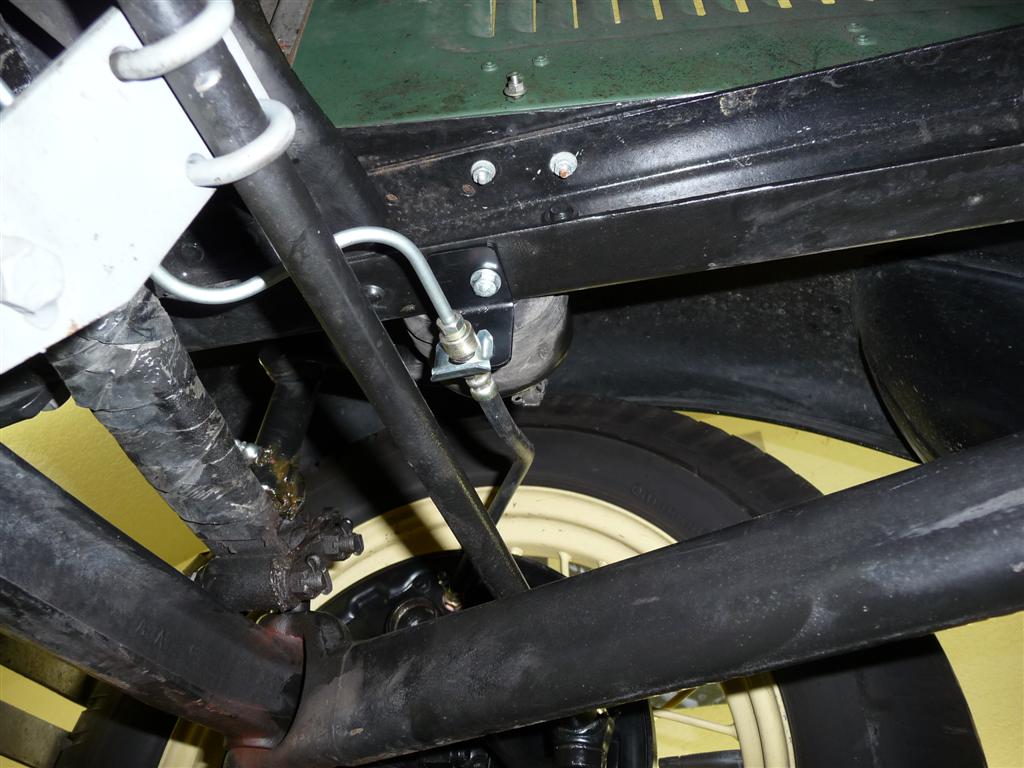
Now that all the major mechanical work is done, it's time to run the brake lines. Standard 1/4" steel line with flare fittings is used. I used a simple Tee in the rear to connect the two rear brakes, then a single line runs up the inside of the rear torque arm. Here's the right rear...
And here's the left rear...

And here's how it goes over the differential. I made a little bracket in the middle to stabilize it, but it's on the far side, so you can't see it here.
In the front, I made two little angle brackets (similar to those in Les Andrew's book) to hold the end of the rubber hose coming from each wheel. On the driver's side, I used a factory '39-'48 Tee for the connection, then ran the line along the frame. I made a couple of brackets to support the line between the front wheels (under the radiator) and between the front left and master cylinder. The front brake hoses and clips are from a '39-'48 Ford. Here's the left front connection with Tee:
Here's the front right:
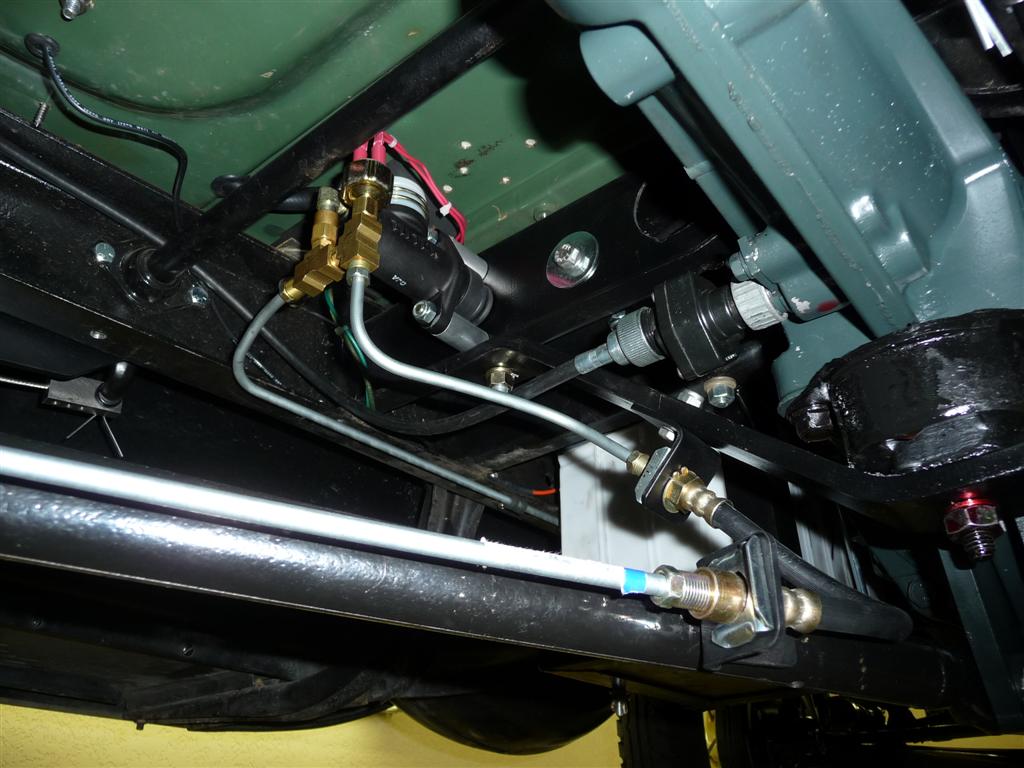
Finally, it's time to connect all these lines together back at the master cylinder. I used a rubber hose (factory '39-48 Ford rear part) between the rear line on the torque arm, and mounted a pressure operated brake light switch in the maze.
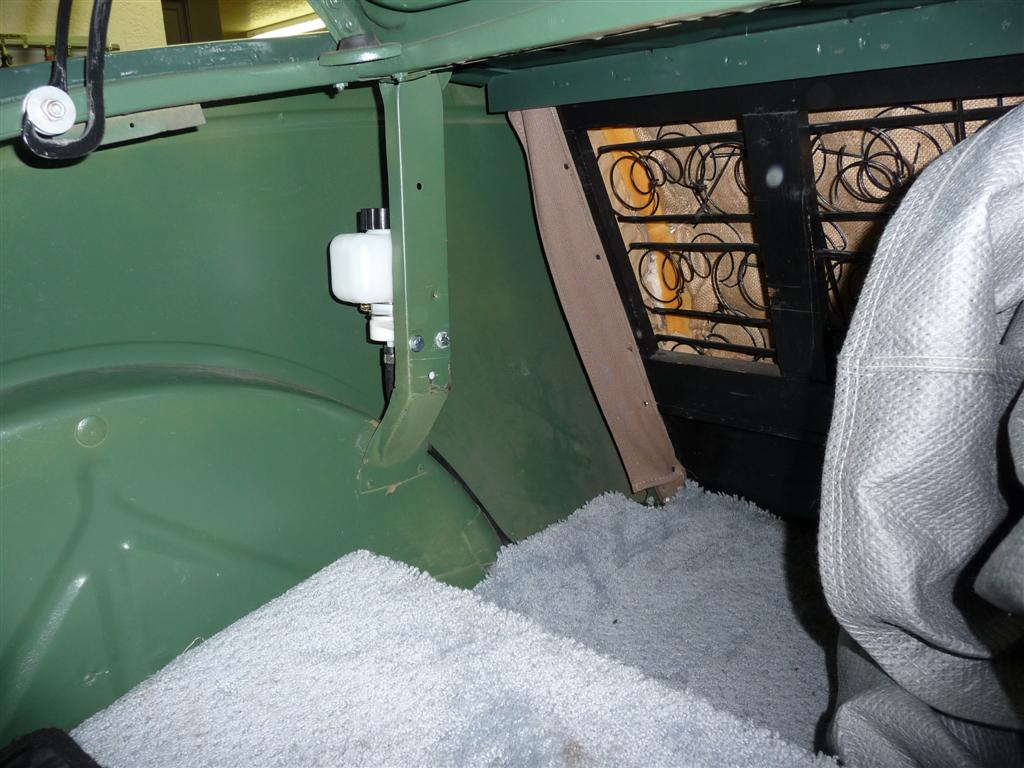
Here's the remote reservoir in the trunk...
After battling the inevitable leaks, I got it bled. The worst of the leaks were in the Tees I put up by the master cylinder, but I also found that the rear slave cylinders that I had rebuilt leaked, so I had to get new ones. I thought that might be the case since they were very rusty inside to start, but gave it a shot - little to lose since I had the rebuild kits anyway. At CarQuest, I bought some bleeder nipples that have a ball valve in them. These truly do allow you to do a one-man bleeding job. My wife appreciates that, since normally I'm under the car grumbling as she's pushing the pedal over and over. Who can resist grumbling when there's brake fluid getting all over you, and worse yet, on the painted surfaces of your nice car, ready to eat away the paint.
The brakes do work much better now. I've only driven it a few miles so far, but it's already getting to the point where I actually expect to stop every time, rather than getting ready to pull on the emergency brake when something I've done goes astray. See disclaimer below.
As I mentioned earlier, next time I would use a 1" master cylinder, rather than a 1 1/8" size. That would reduce the pedal pressure some. The original cylinder on '39-'48 cars is 1".
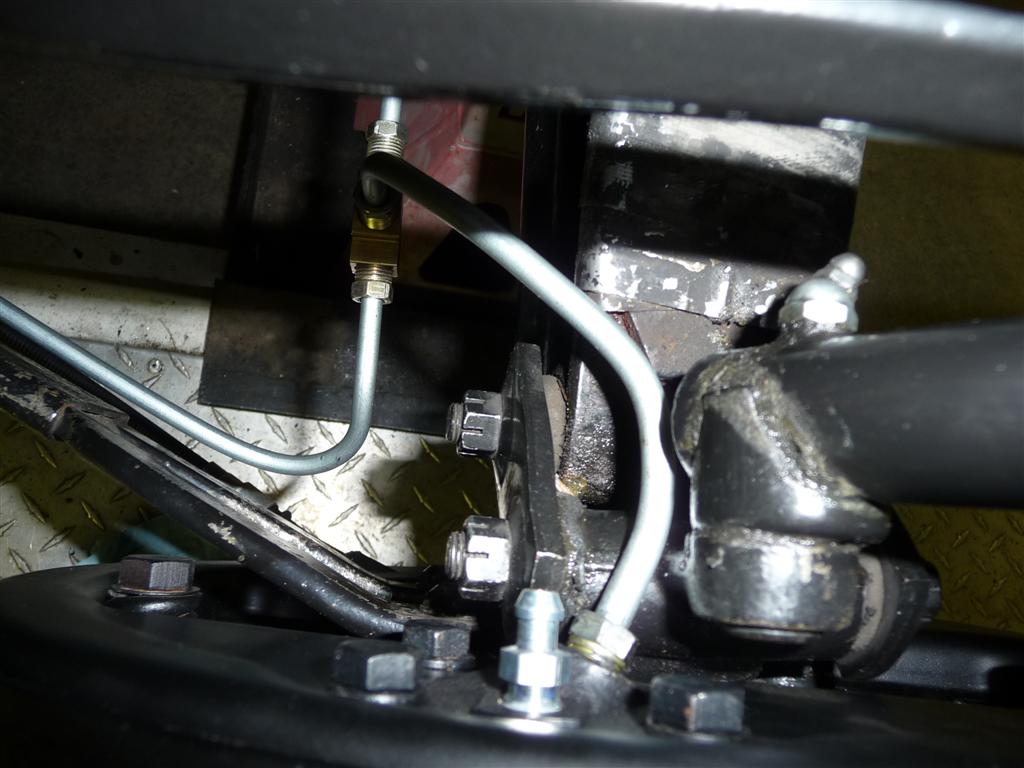
The brake lines are very close to the rear suspension...
I think next time I would try mounting the rear backing plates upside down (and not rotated a few degrees) so that the slave cylinder would be on the bottom and the emergency brake cable on the top. It would be necessary to swap the left and right sides to do this. This would allow the hydraulic lines to be clear of the suspension, and also the emergency brake cables would be shorter and more direct. If you were to swap the slave cylinders side to side, the bleeder could be at the top of the slave cylinder on each side too, so I think it would bleed fine.
Keep in mind that this conversion wasn't professionally engineered and if you use any of my ideas or suggestions, I disclaim all liability for direct and consequential damage - you're on your own! Brake work is potentially very dangerous, so use extreme caution when making any changes.