
With the slight forward move of the shifter in the car, it was necessary to get a ’72-73 240Z console. Nissan had moved the shifter forward in the car during these model years. I paid an obscene price for one on eBay – there must be other folks out there needing these consoles for the same reason. Fortunately, my old one sold for almost as much on eBay, so I guess there is a demand for all consoles in nice shape.
I made brackets for mounting the new console and the shifter location was perfect. Earlier I had welded a panel to cover the rear of the shifter opening in the tunnel that was no longer needed. I've learned in the past that a significant amount of noise can come from the transmission if you aren't careful about this.
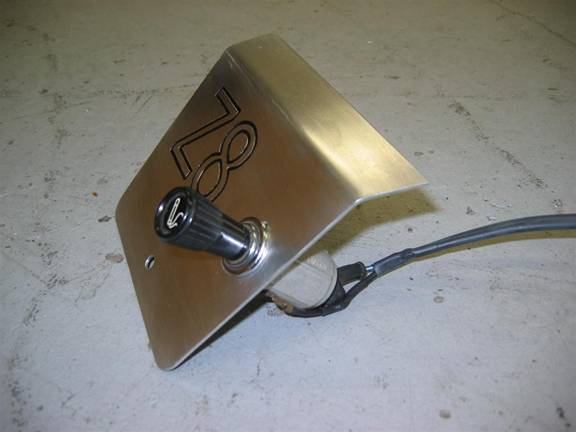
Now, the only problem was that in the '70 and '71 consoles, the cigarette lighter was in the console fuse panel cover, and on '72/'73 models, they had moved it to the dash. Also this later panel has some lights and switches not applicable to the earlier Zs (choke,…). So where are you going to plug in your GPS or radar detector? I decided to make a fuse-box cover for the later console that incorporated a cigarette lighter. Here it is:
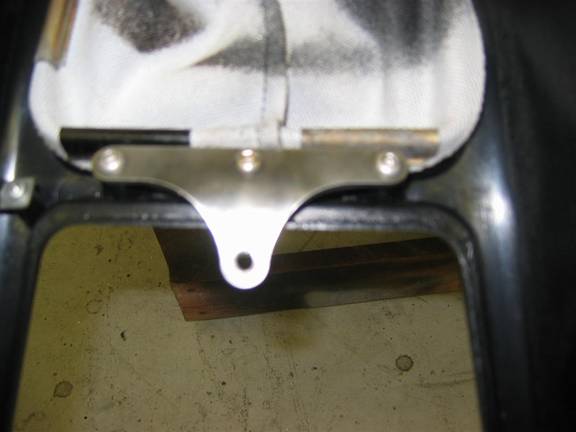
Then I made a bracket for the console that bolts to existing holes for a thumb screw to hold this in place without rattling.
And it all bolts together to look like this…
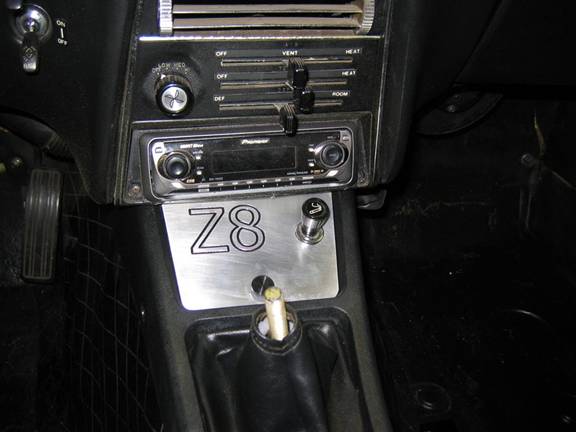
After this picture was taken, I added a nice Ford Motorsport leather shift knob which has the shift pattern on a brushed aluminum plate.
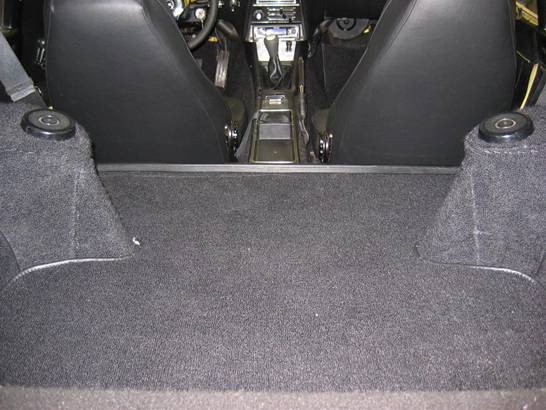
In the "next time" list, I would consider not using a console at all. When the hump was recarpeted, it looked very nice without the console at all. However, you would need to figure out a cover for the fuse box in this case.
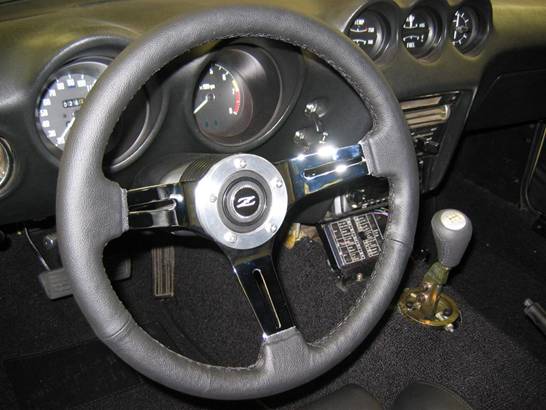
I like the looks of the stock steering wheel, but I wanted a fatter padded rim for driving comfort. I ordered a nice leather-rimmed 13" aluminum wheel from The Z Store (Motorsport Auto) but was disappointed to find that it was a Grant wheel significantly smaller than the original. I assumed that the dimension was measured from the center of the rim, but the Grant was measured to the outside. So rather than being slightly smaller than I expected, it was a lot smaller. By this measurement system, the original wheel is 15". I sold the Grant wheel, but hung onto the Grant adapter kit. On eBay, I found a 14" wheel for a Corvette ('68-'82) that was leather rimmed and had nice looking spokes. To install the new wheel, I drilled the Grant bolt pattern into the wheel and made a new trim ring around the Z logo (part of The Z Store kit). It's hard to measure the diameter of a 5-bolt circle, and the best I could do was measure the bolt circle diameter at 2.850 inches. Since this didn't correspond with any normal dimension, I contacted Grant, and found that they (and some other manufacturers) use a 2.840 inch circle. Seems strange, it doesn't correspond to any American fraction or even metric measurement(it's 72.14 mm). Well, that's what it is. I shortened the Grant adapter to make the steering wheel orientation about the same as stock, then sandblasted the adapter to get rid of the flashy polishing, and painted it matt black. When time came to install it, I discovered that the horn ring was a long way away from the original (almost ¾"). I talked to The Z Store, and they tell me that this is normal, just bend the heck out of the contact. I don't like this approach, but couldn't think of anything better, so installed it this way. The roll pins that cancel the blinkers are also extended out to their limit. So "next time" I'll find something other than a Grant wheel adapter. Even though the adapter is a poor fit, Grant's customer support is very good.
Here's what it looks like after installation:
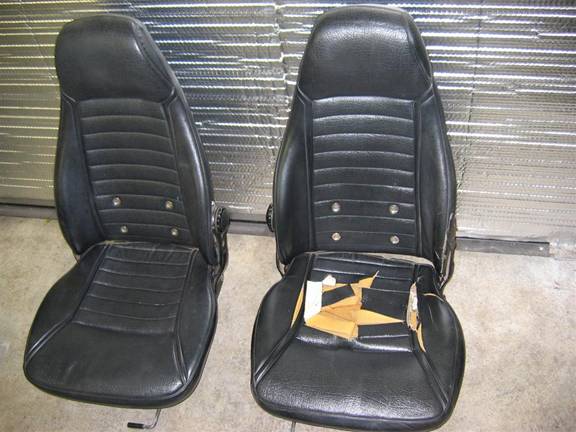
My original seats were looking pretty shabby, especially after I took off the sheepskin cover on the driver's seat.
I looked around in junkyards for suitable replacements from another car, but didn't come up with anything workable. The main fitment problem is that the Datsun seats are narrow, relatively low from the tracks to the seat bottom, and the backs are thin. I have been told subsequently that Miata seats can be made to work fine.
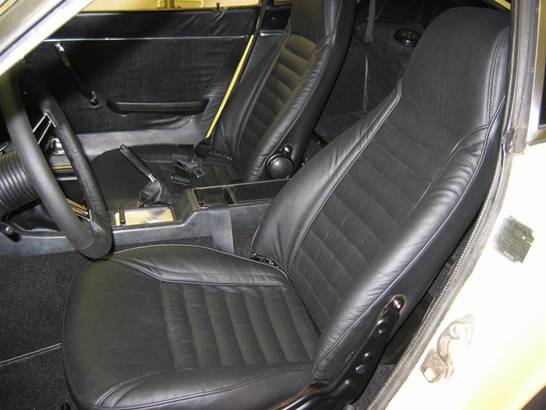
After a little surfing, I found that Corbeau makes some nice seats, the GTS II, which you can even get with 240Z mounting brackets. I figured that these would be better seats, and probably not much more expensive than reupholstering the originals, so I ordered up a pair. And they are nice. However, once I mounted them in the car, I discovered that they are significantly higher than the original seats, don't go back so far, and the back won't tilt quite so much (hits the wheel well). They would be fine, I suppose, if you are 5'-10" or less, but at 6'-1", I felt out of place sitting there with my head brushing the headliner and barely seeing out of the top of the windows. As an aside, I was a little disappointed in the mounting brackets with Corbeaus. They were overly heavy, and had to be disassembled to get the mounting bolts into the brackets. They were bolted together with stacks of washers in some places. Anyway, I could have fabricated lighter brackets that would work better, but I couldn't change the geometry enough to make them comfortable – the fundamental problem is that the bottoms are slightly longer, and the backs slightly thicker than the Z seats. They are also 26 lbs heavier than the stock seats (80 lbs for the pair with brackets).
This is what a Corbeau GTS seats looks like in the car:

I decided to have the original seats reupholstered. The Corbeau detour was an expensive mistake, but I'm sure that the seats will find a good home in a future project of some sort.
I took the car to a local upholstery shop and had new carpeting installed (including replacing the diamond-pattern vinyl with carpet), and the stock seats recovered with leather covers and over new padding, both sourced from The Z Store.
Looked like this inside now:
I still couldn't convince myself that the covers on the seats looked right. The bolsters weren't even side to side, the seams didn't line up properly, the gap between the bottoms and back was uneven, and the stitching wasn't even on the pleats on the back. I took the seats back out and went to another upholstery shop which I knew did good work (Rich's Custom Seats in Seattle) from my experience with some nice motorcycle seats he had done for me. His analysis was that even though the quality of the leather was very good, the covers weren't sewn straight to begin with. The only solution was to take them apart, restitch them, and put new backs and sides on since the original installation left holes for the mounting brackets in the wrong location. After taking them apart, he discovered that there wasn't enough material left to straighten the seams, so he had to resort to making covers from scratch. My expensive covers from The Z Store ended up as serving as nothing more than a pattern (and one that needed to be straightened at that) for the final seats. The first upholstery shop also charged extra since the new foam padding from The Z Store didn't fit without cutting and splicing the foam backs, they were too narrow as received.
So, more money going into the project, but the third attempt of the seats was a charm and at last I'm happy when I look at the interior. I could have saved a lot of time and money by discovering that the covers were improperly stitched prior to installation, and also by going to the known-good upholstery shop first, rather than taking a chance on a shop closer to home.
But, here's the final result:
>
They are dang comfy too!