
So at this point, I was ready to do a trial fit of the engine and transmission into the car. I had previously pulled the Z-motor/tranny and hauled the car to a steam cleaner so that it would be more pleasant to work on.
Let's lower that engine and transmission into the car for a trial fit! Notice how high the front of the car sits without an engine and transmission, and this is with springs that lower the car:

After positioning the engine and transmission into the car, I could see that this was going to be a good fit. Lots of room on the sides of the motor, although the driver's side header slightly interfered with the steering shaft, and it was a tight fit between the firewall and the back of the motor. But it was going to work with the engine nestled between the front cross member and the firewall.

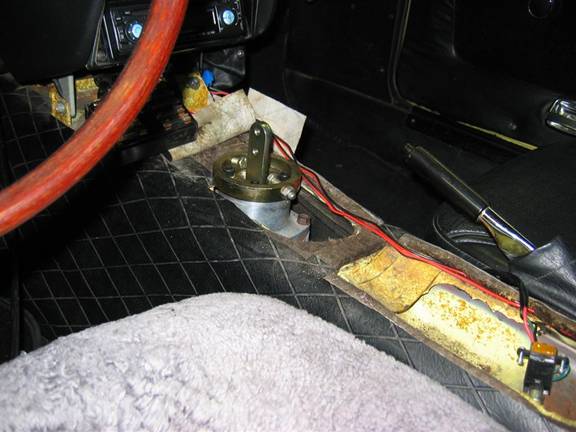
The shifter came out of the tunnel about an inch forward of the stock Datsun shifter – right where it did on the 240Zs starting in '72. I had to do a little cutting on the console to extend the opening forward and slightly larger.
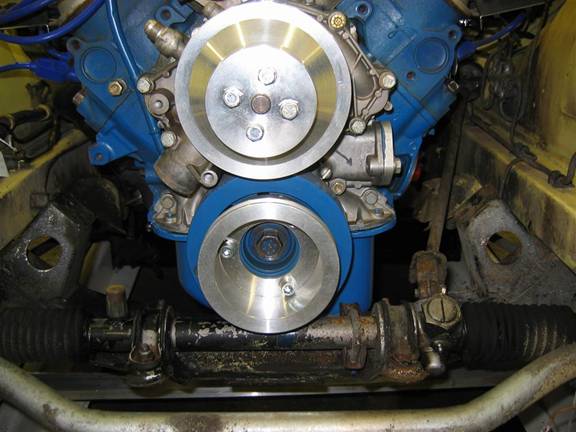
The front balancer on the crankshaft clears the cross member just about right if the motor is raised to the height that gives about the correct ground clearance for the pan.
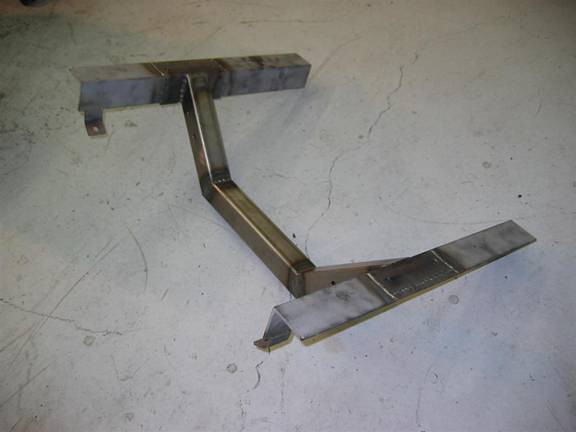
After some head scratching and measuring, I designed and fabricated a front motor cradle that would sit on the frame rails and go under the motor.
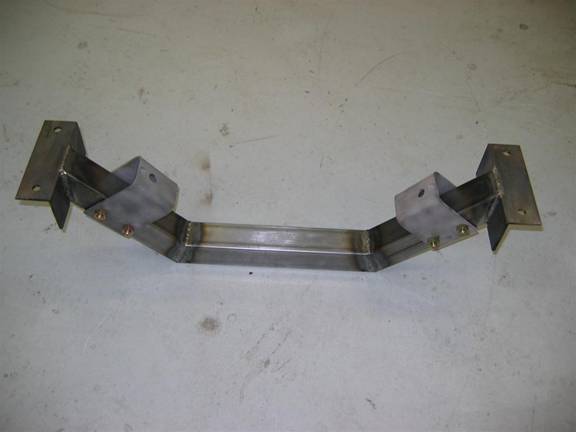
The frame of this is made with 2" square stock (.093 thick), at 45 degree angles, and the angles on the side are 3/16" thick angle iron. The motor mounts (set at a 50 degree angle) are of 3/16" x 3" steel strap. The motor mounts and angle are attached with 7/16" bolts. The rear bolts to the frame go through where the frame is stiffened for the rear compression rod mounts, so it is nice and strong.
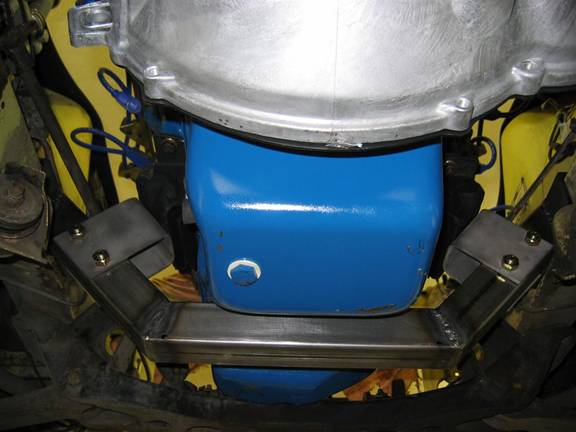
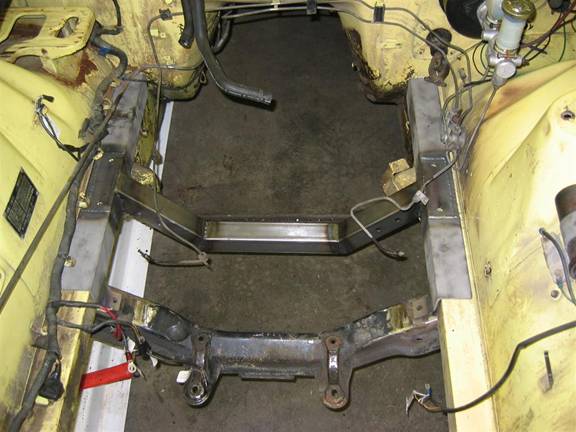
Here's how it looks in the car:
I think this would have been adequate, but when installed, I could see that there was a little flexing where it met the frame. Being a worry-wart, I thought that if it's flexing even a little now, what's going to happen when you start applying a lot of torque? If it ever torques the frame, I might as well kiss off the Z's body structure.
So after worrying about it, I extended it further out so the outer edge is very close to where the frame of the car meets the fender wells, back to the firewall, and forward so that I could bolt it to the cross member. If it fails now, it's going to take the whole front of the car with it.
For the side rails, 2 ½” angle is only readily available in 3/16" thickness minimum, so that's what I used. With the motor mounts and bolts, this assembly weighs 19.9 lbs (it was 11.7 lbs before I extended it). I think that if I were to do this again, I would probably start at the rear dimension of the original concept, and then weld together some 2 ½” x 1/8" strap to form the angle iron going forward. This would probably only weigh about thirteen or fourteen pounds, and be plenty strong. Actually, even the original size was probably plenty strong.
JTR mounts the Chevy motor ¾” to the right of the car centerline, saying that this is similar to the original Z mounting. I measured the original car and found the crankshaft to be ¼” to the right of the car centerline (the top of the motor, since it is tilted for carburetor space, is about 3" to the right of center). To allow slightly more space for the exhaust, but still be similar to the original car, my mounts put the motor 3/8" to the right of centerline.
A thought for "next time" would be to extend it a little lower by lengthening the angled tubes and shortening the middle section. This would allow it to fully protect the pan – however if you hit an immovable object with this sturdy brace I don't know what it would do the Z. I'll take my chances with the oil pan since there is plenty of ground clearance, even with the lowered car.
Another thought for "next time" would be to make the mount of two pieces with a connecting piece of U-channel on the lower portion of the cradle that would allow you to bolt the two sides together. This would make engine installation a lot easier since you could lower the motor into place, and then install the cradle.
Here's how the mount fits into the car. I ground the old Datsun mounts off the cross member since they weren't necessary, and to give a little more room for the oil filter. The motor cradle needs to be slid forward a couple of inches during motor installation, then slid back once the motor is lowered most of the way.
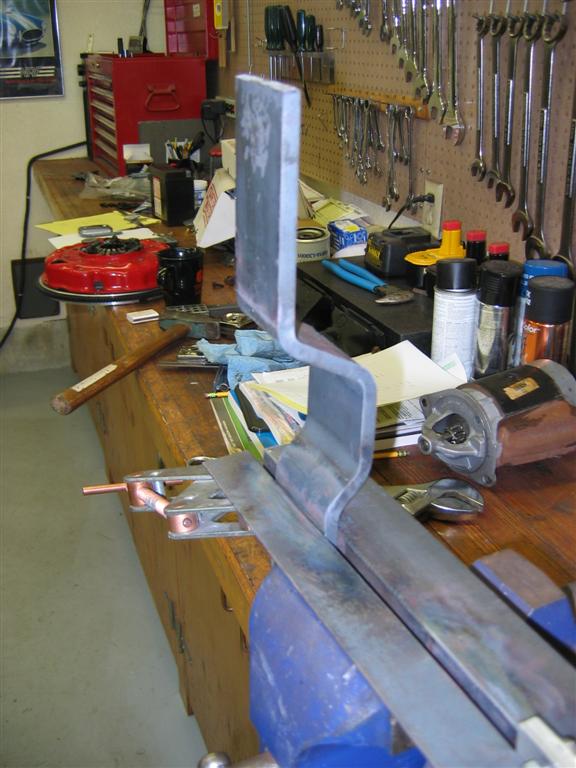
For the transmission mount, I started out with the rough concept from in the JTR book, with modifications to bolt the Tremec mount instead of the T5. It's made of 3/8" x 3" steel, and is a challenge to bend accurately, even with the liberal help of your torch.
Here's what it looks like when installed:
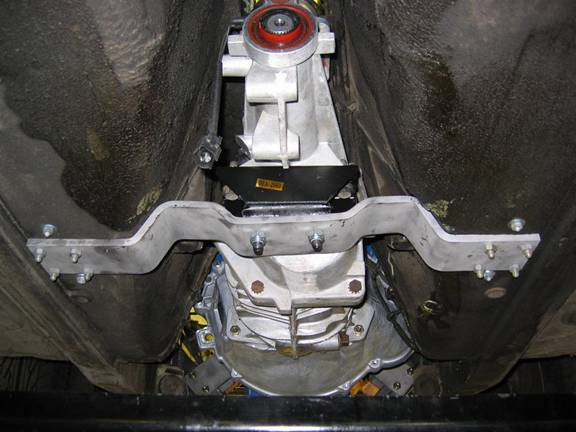
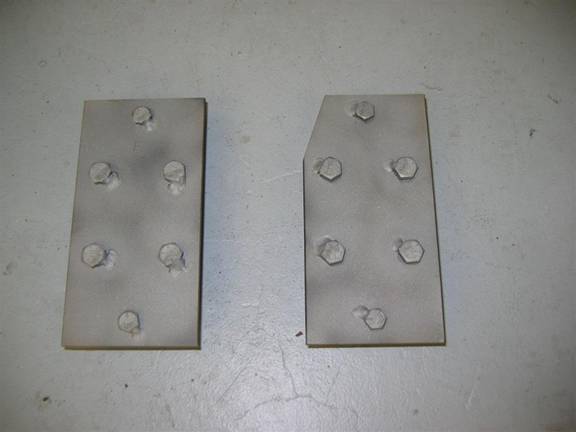
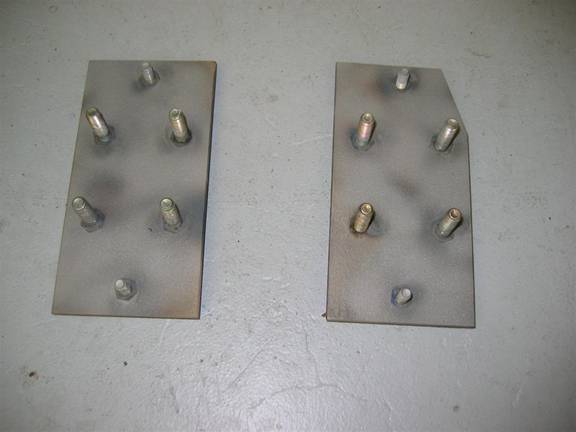
On the top side of the floor pans, I made some plates out of 3/16" thick steel. I welded in some captive 3/8" bolts that go through the transmission mount, and also some ¼” bolts that hold the top plates down all the time, just so one person can easily install the transmission mount from the bottom without pushing the plate up or the bolts spinning. By the way, the "bumps" in the transmission mount are there to give exhaust pipe clearance. And I did have to slightly hammer in the tunnel at the edges of the mount for these bumps, but it's not noticeable in the car.
Here are the plates that mount on top of the floor pan:
The transmission mount weighs almost eight pounds. "Next time" I would use either narrower stock (like 2”) or thinner stock (like ¼”) to keep the weight down and make fabrication easier. I used the JTR-sized stock because I know it would be plenty strong, but also recognize that a Chevy 350 is heavier, has more torque, and with the front engine mounts way at the front of the motor instead of mid-motor like with the Ford, it places a lot more stress on this mount. However, I figure a couple extra pounds here and there for peace of mind aren't going to make a car like this slow, maybe just a tiny bit less fast. Plus the weight is right in the middle of the car.
Since this was my first engine conversion, I figured the biggest part of the job would be the engine and transmission mounts. But as I look back now, that part took just a fraction of the time of the entire job. The devil is in the details!