
With this amount of power, I wanted to have a strong, limited slip differential. The 240Z's use an R-180 differential, while the later, more powerful Z's use an R-200. The last part of that designation is the size of the ring gear in mm. So an R-200 has a 7.8" diameter ring gear and the R-180 has a 7.1" ring gear. The distance between the output flanges is about 1 ½" wider on the R-200.
On CraigsList, I found a limited slip R-200 differential from a 1988 300 ZX turbo (3.70:1 ratio), and a seller willing to ship it from southern California to Seattle. He also included the mounting brace and moustache bar for it, since these differ from the one used in R-180s. Here's the difference in size between the two:
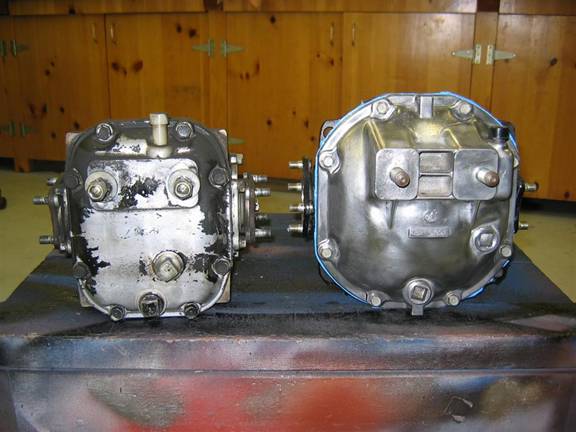
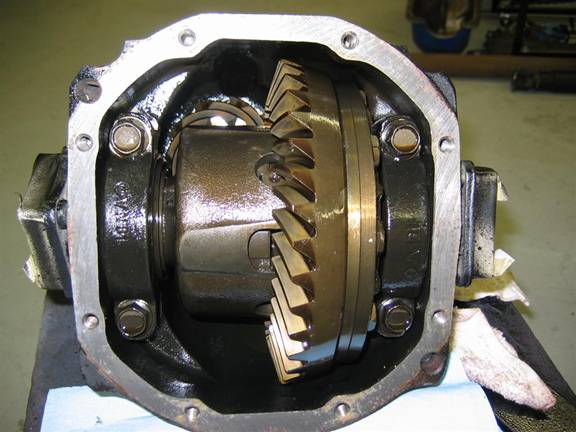
The inside of the R-200 looks like this, plenty stout:
The penalty that you pay is about 21 lbs. The R-180 weighs 60 lbs, and the R-200 LSD weighs 80.7 lbs.
The R-200 is pretty much a bolt in installation. The same half-shafts from the original Z can be used, and with the 300 ZX rear mounting brace and "moustache bar" the rear bolts in as well. The early Z-cars, like mine, positioned the differential further forward in the car than the later ones, placing the half-shafts at a forward angle. Later cars moved the differential back to correct this, as did this 300ZX mounting parts. I was worried that since the R-200 is so much wider, and also the axle shafts are more parallel after the relocation, that the stock half-shafts would be too long. In practice, though, this hasn't been a problem.
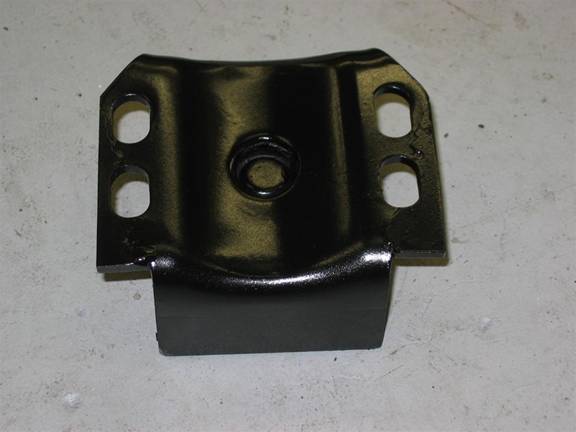
The cheap and dirty way to change the front mount is to simply reverse it and bolt it all together. I originally did this, but found that, since the mount is at an angle, things bind up when you tighten up the bolts. I don't like that, so I welded some "wings" on to the rear of the original mount, and drilled holes in the correct spot. This maintains the proper angle and nothing binds up. The original holes are at the top, and you can see where I did some welding. It isn't great fun to weld parts with rubber. You have to weld until you can't stand the smell of the burning rubber, throw it into a tub of water until it cools a little, and then repeat that sequence until done.
Since the input shaft of the R-200 is larger than that of the R-180, I put some spacers (about ¼" thick) between the differential and its rubber mount. Otherwise it could rub.
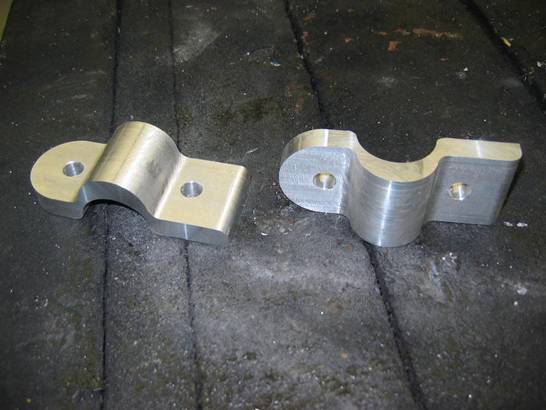
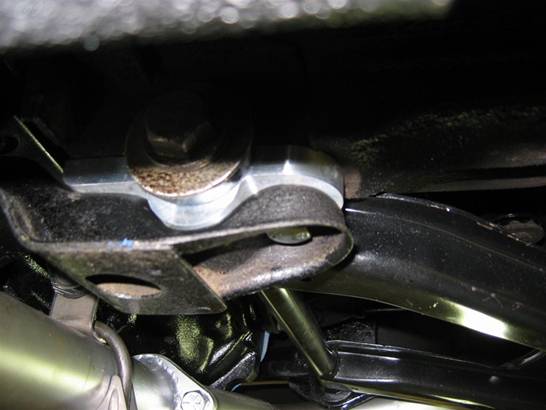
It's a very tight fit for the new, much larger rear U-joint. It's fairly close to the emergency brake linkage on the driver's side and top. Also, the rear U-joint has quite an angle to it. While this might work in practice, I didn’t like the looks of it and decided that the front of the differential needed to move down about half an inch. To achieve this, I machined some spacers that fit between the ends of the front differential mount and the body structure. Unfortunately, they also capture the front pivot joint for the suspension, so needed to be a pretty unusual shape:
This is what they look like installed.
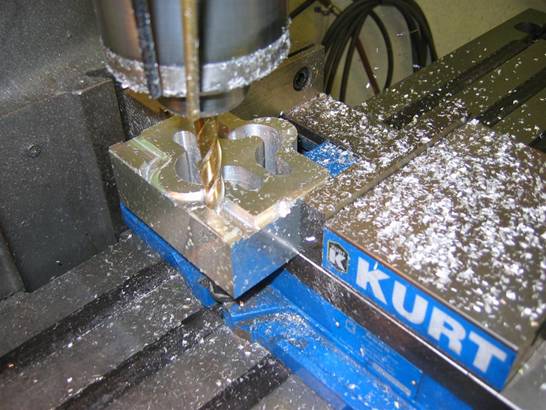
If you decide to have a machine shop make you some of these, and they quote a lot of money, it' because they take a big chunk of aluminum to start out with, then are time-consuming to make. They deserve it! Here's mine as I made them:
Because of the difficulty in machining these, it might be easier to accomplish the improved geometry by cutting the front differential brace, and rewelding the center section lower.
The final issue in the differential mounting is the front "safety strap." The Z's have these from the factory as a way to limit the amount of movement of the front of the differential. The mount is about a foot forward of the axle centers, so it forms a lever arm rotating about the axles (half-shafts). Imagine that you have 300 ft lbs of torque from the engine, put it in first gear so now you have over 900 ft lbs of torque on the driveshaft. The differential (in my case a 3.70:1) multiplies that again by almost four, making potentially over 3,000 ft-lbs of torque on the differential case. It's probably less than this since the tires would break lose, but you get the idea. You can see why you wouldn't want to let that rubber isolator handle all of this, so Datsun wisely put a stout limiting strap on the front of the differential. Some folks think that this is there in case the rubber mount fails, but my theory is that it works in conjunction with the rubber mount to limit its travel.
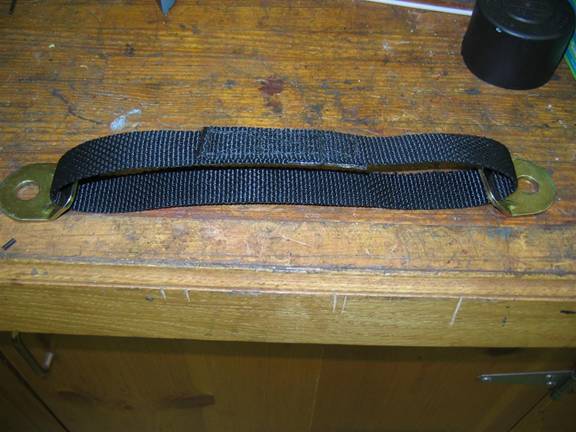
Unfortunately, the factory strap won't fit anymore once you move the differential rearwards. JTR suggests wrapping a cable around the mount and differential, and although that probably works fine, I try to do things the way you might see in a production car. I purchased some 1" wide webbing from McMaster-Carr that is rated at 3,800 lbs, then doubled it around brackets also from McMaster, and had a local upholstery shop sew it up with a "seat belt" stitch. They were nice enough to sew it for free. Here's what it looks like:
And this is it installed in the Z, it bolts where the original strap was secured, although it is necessary to flatten out the flange adjacent to the bolt holes:
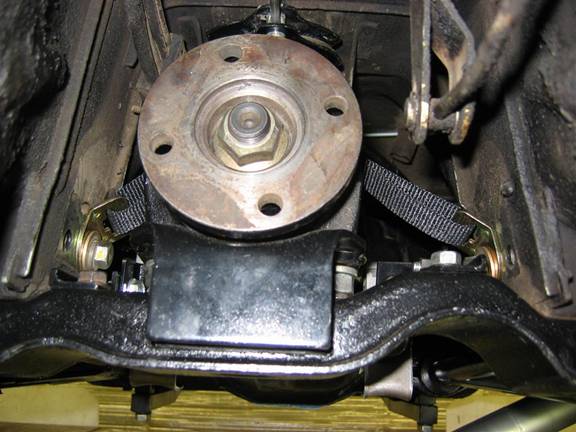
I put the doubled up section (where it is sewn) against the top of the differential so that there is more abrasion resistance.
The Tremec uses a standard 28-spline Ford output, which is used in both automatic and stick shift Fords. The first car I came across in the junk yard with one was a '72 Ford station wagon and it was about six feet long. I had it shorted by the local driveshaft shop to 18 ¼" (from u-joint center to center), so it looks like this:
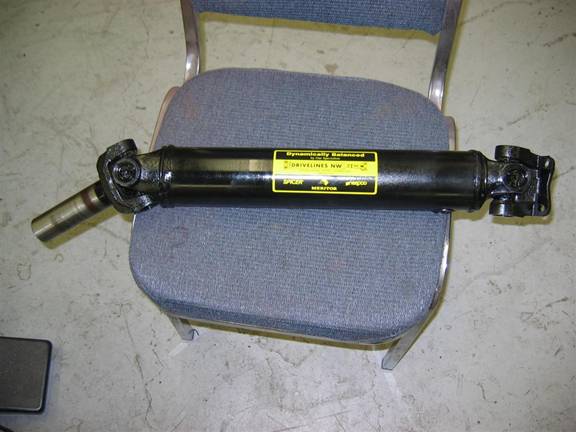
I purchased a larger yolk for the R-200 from JTR shown installed on the right end. JTR recommends purchasing allen bolts for installation, which I did, but then I discovered that even they need to be machined off on one side to fit the yolk, so it would have been just as easy to machine off the original bolts. It is nice once the bolts are machined since they don't spin when you install the nuts on the back. It's still kind of a knuckle-buster to install the drive shaft.
I told you I would mention mistakes, and here's one. I ordered my driveshaft, and after doing so changed the differential mount, and subsequently discovered that this altered the length of the driveshaft, so that mine didn't work anymore. My mistake for not waiting for the parts on the ends of the driveshaft to be finally mounted. I went back to the driveshaft shop and told them that they had done a perfect job on what I had ordered, but I was a dummy and had ordered the wrong length – could they shorten it a little? They said that this was some kind of a record that someone coming back didn't blame them to some extent for the problem. They shortened it and rebalanced it for very low cost as a result. Doesn't hurt to own up to your mistakes.
Since doing the Z8, I've become aware of another front mounting system for the differential that I think is superior to my solution. This approach eliminates the need for the safety strap and the lowering spacers, while providing the same geometry. This method uses a steel brace that bolts to the safety restraint strap bolt holes, goes up over the top of the front of the differential, and has the mount at the top, rather than the bottom of the differential. With this approach, it mount is under compression, rather then tension when it is under the most stress (acceleration). The mount looks like this from the top (and front of car when installed):
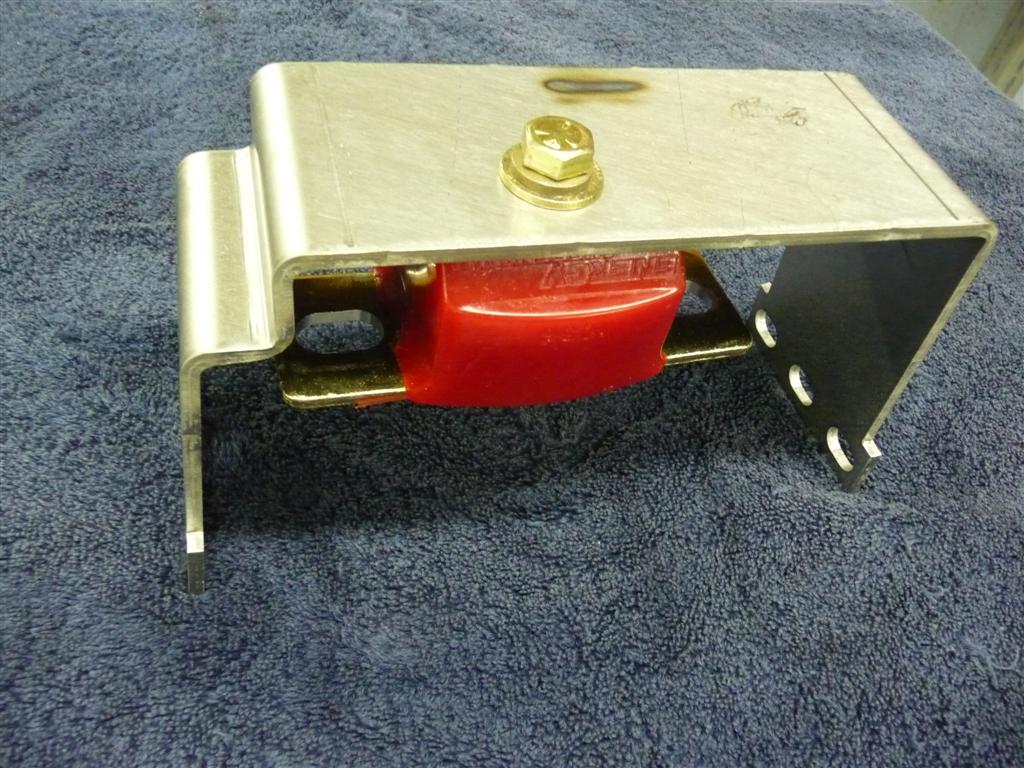
This is looking at it from the bottom when it is upside down:
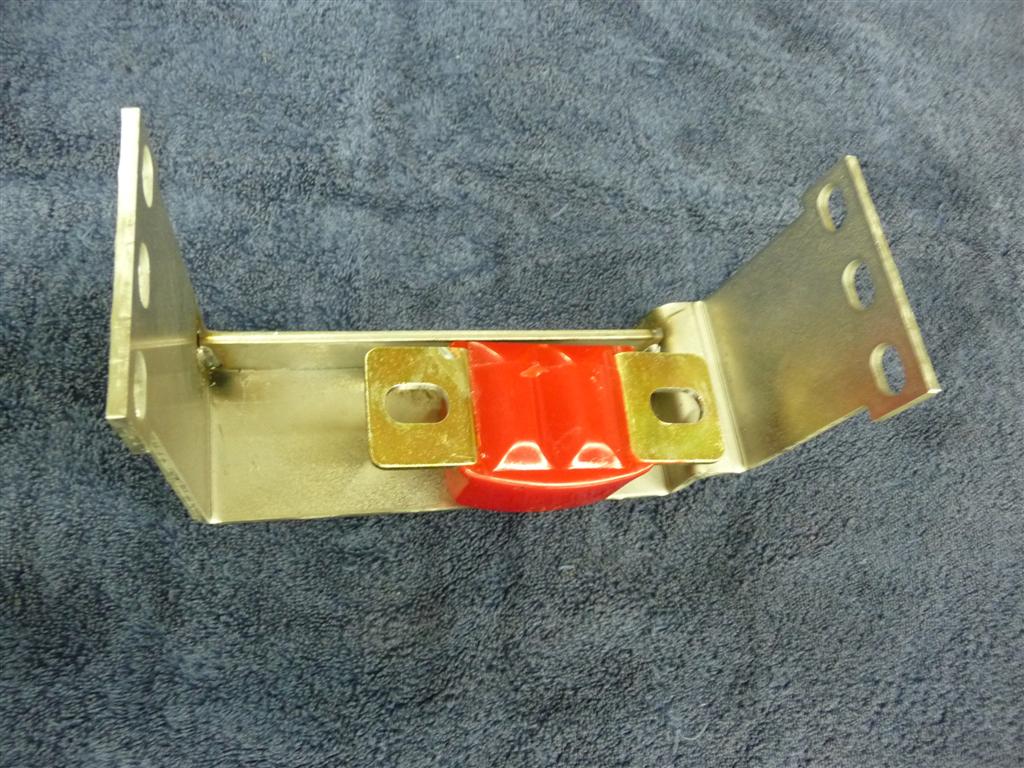
The notch at the top is clearance for the fuel lines running through the tunnel. The flexible part of the mount is from Energy Suspension (PN 3-1108R), and was originally designed as a GM transmission mount. It is made of polyurethane, and has metal internal elements that prevent it from separating too far when under tension (deceleration). It is necessary to machine out the slots to be slightly longer towards the insides (3.55" between hole centers), and slightly wider (9/16" instead of 1/2"). This mount was originally designed and sold by R/T, and there is information about it in the HybridZ site.