
This project is an arena groomer. Horse arenas have a loose top layer that provides some cushioning for the horses, but gets uneven after being used a few hours. An arena groomer breaks up the surface, then levels it out.
Commercial groomers are generally pulled behind a tractor. This means that you need to connect and disconnect each time you use it, then adjust the groomer for proper operation since they often require one of the adjustments to be disturbed when you hook and unhook. In addition to the issue of hooking up and disconnecting each time, because of the way they are configured it is difficult to get into corners of the arena, and you can't back them up.
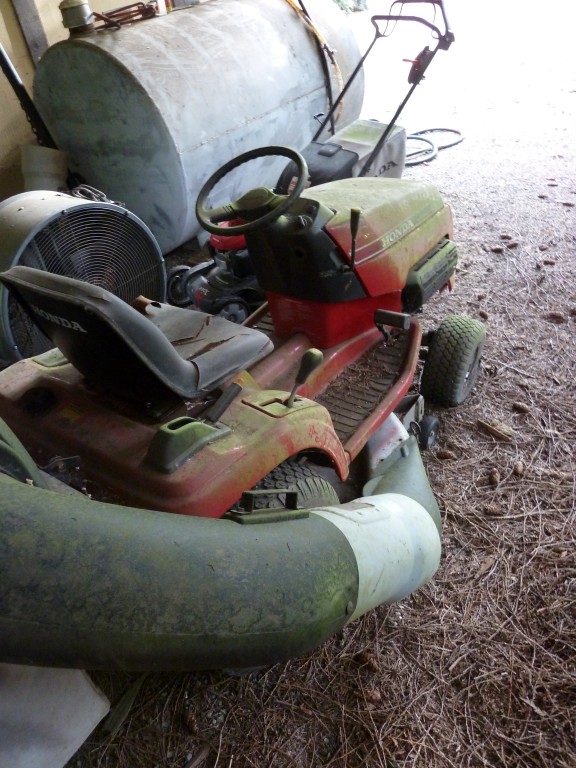
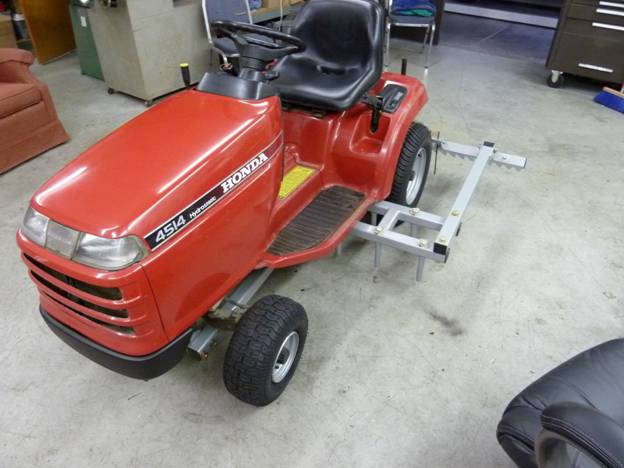
The idea of this project was to overcome some of these issues by making a self-propelled groomer out of a riding lawn mower. I had an old Honda mower that sat behind a shed for many years after the blade clutch went out, the battery dead, tires rotted, the carburetor removed for another use,... It looked like this:
I decided to remove the mower deck, and use the attachment points for the mower deck to connect a groomer. That way, the hand-lever that previously set mowing height could be used to adjust the groomer up and down, and it could be easily maneuvered.
The project began by doing some serious clean-up work on the lawn tractor, reinstalling a carburetor, removing the bad blade clutch (replacing it with a spacer), and removing the rest of the old mowing hardware.
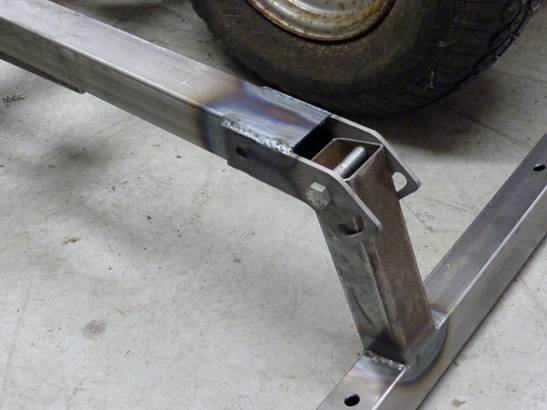
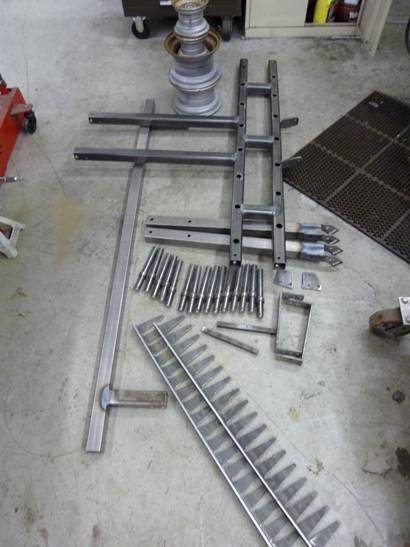
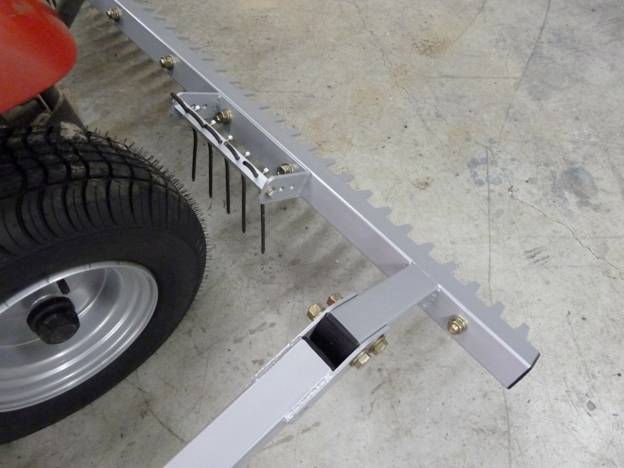
Once that was done, I started fabrication of a sub-frame from 2" square tubing. It pivots from the front mower-deck points, and hangs in the rear from the lifting arms of the mower deck.
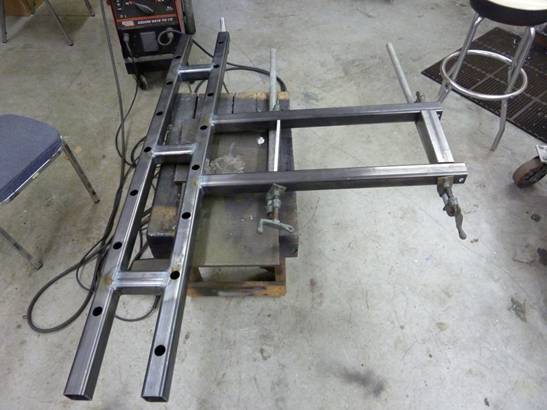
All those big holes are there for installation of the tines. The tines are made from 1" diameter steel rod that I cut to length and put a little chamfer on the ends. Then I drilled a hole in the end for a clip to hold them up, and made lower stops by cutting little chunks of water pipe to length and welding them on.
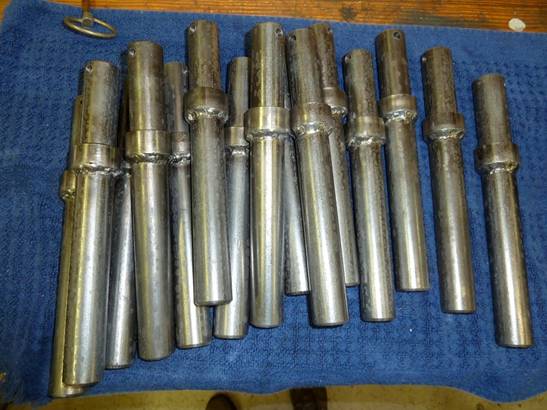
There are fifteen of them on this groomer, in two rows with the overall width of five feet. They weigh quite a bit, maybe one could get by with thick tubing instead of sold material.
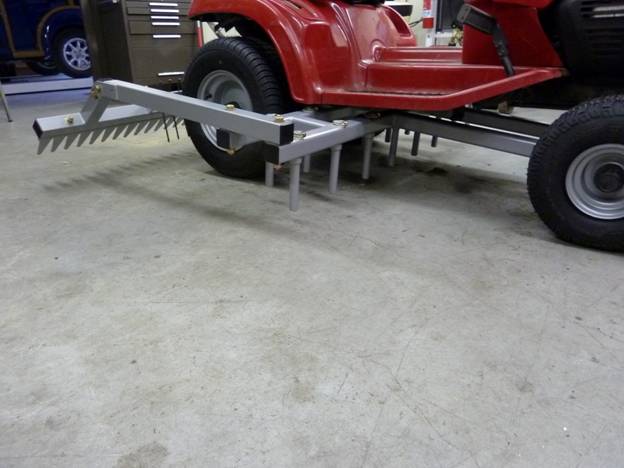
The tabs on the left connect to the lift-arms of the mower.
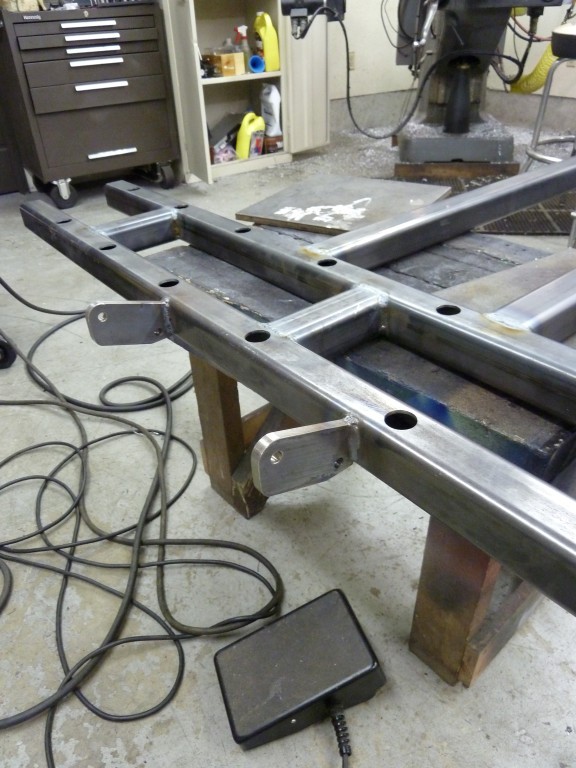
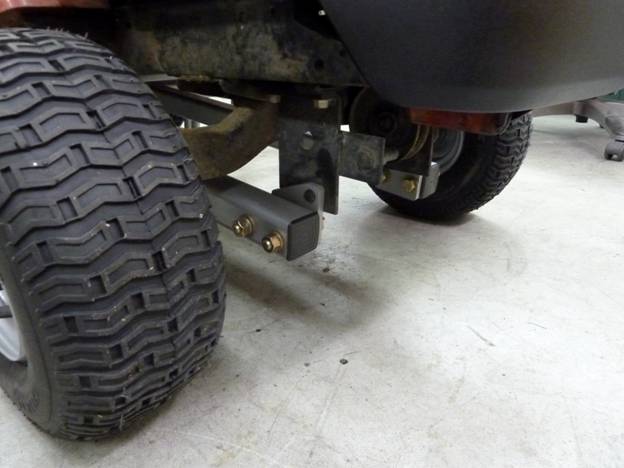
On the front, triangular plates attach the groomer to the pivot point on the mower.
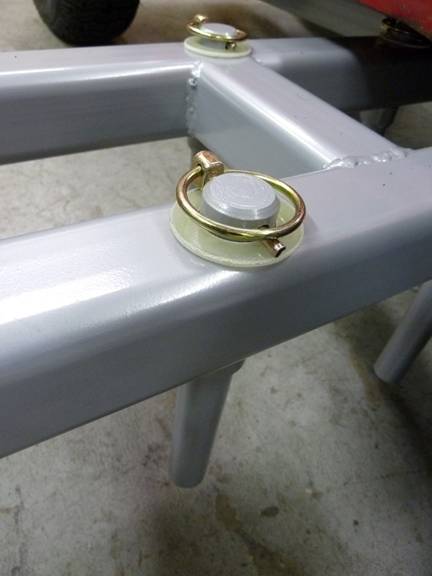
The tines are installed with a washer and circular clip on top. I found some non-metallic washers so they wouldn't rattle.
Now we have the mechanism to rip up the arena material, so we need to smooth and level it. To do that, I machined a "rake" out of a piece of 3"x5"x1/4" angle iron.
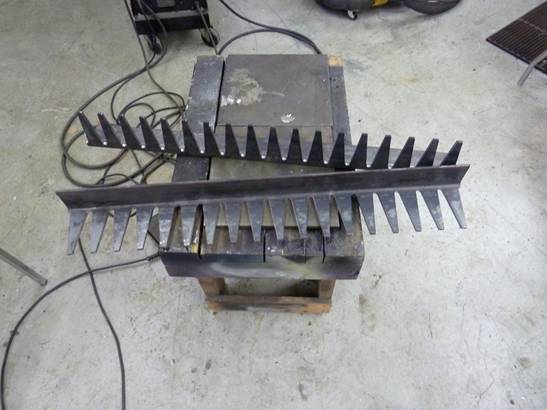
After cutting out the fingers (tines) on my milling machine, I decided that the other side of the angle was too tall, so I decided to cut it down to about 1 3/4" from its original 3" width. That turned out to be tough since it's 1/4" thick and six feet long. In the end, I bought a metal-cutting carbide blade for my table saw from Lowes. It did the deed fine, although there were a lot of sparks flying and the blade was a little worn by the time I was done. In a perfect world, you would be able to find some 2" x 6" x 1/4" angle, but my supplier didn't have any of that.
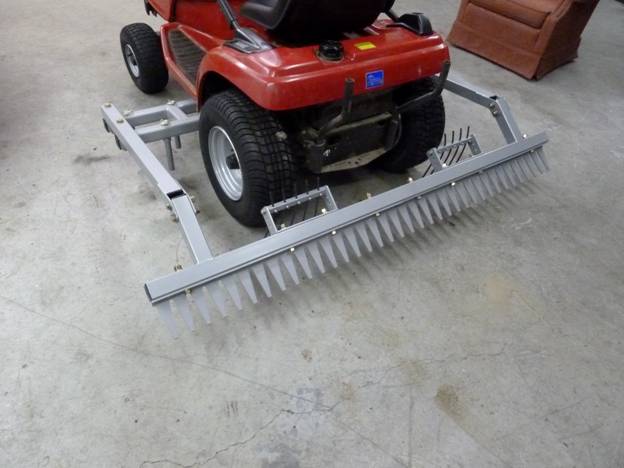
To mount the rake, I built a rear super-structure out of more 2" square stock. On the front part of this project I used .120" thick stock for strength, and on the rear I used .093 thick material to save weight.
I provided for a +/- 20 degree adjustment of the rake with some slots in the mounting brackets. Four bolts have to be loosened in order to adjust it, but that is very infrequently required.
Here's the rear assembled with the rake.
Note that the groomer is out on the patio now. One needs to think about whether they should assemble something 6' wide in the shop if they don't have huge shop doors. I hope you are smarter than I am.
So, we gave it a first trial run, here's my nice wife at the wheel.
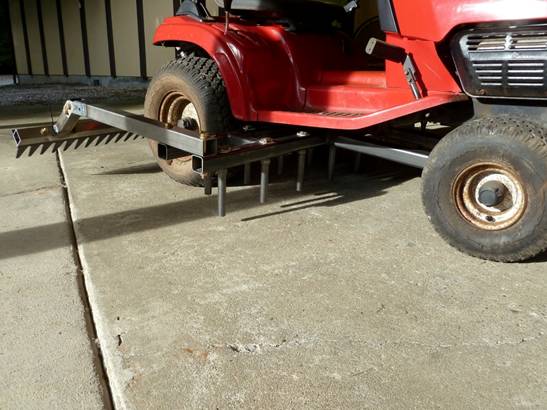
Everything seems to work well, but since the rear tires are between the tines and the rake, they leave occasional tracks after you have raked. Time to see if we can rectify that.
I cut the tines off of a pitch-fork, then made a little holder for them that mounts behind each rear wheel.
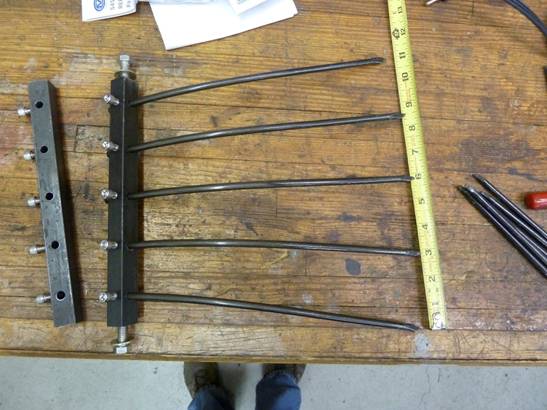
With the screws, each tine can be adjusted up, down, or twisted side to side. The end bolts allow the whole unit to be rotated.
Now that fabrication is done, I couldn't resist taking a pile of parts off to be powder-coated. I had them use Camaro silver, which is the color Rallye wheels used to be painted. It looks kind of gray from a distance, but has some sparkle when the light shines on it.
As you can see in the top, I took the rusty wheels from the lawn tractor in to be powder coated as well. And then, how could I not replace the rotten old tires?
After the powder-coaters did their magic, it's time for final assembly.
My son Ben was home for a weekend and couldn't resist using color restorer on the paint, repainting various parts of the tractor, and gussying up the seat. Doesn't look like the first picture, does it? This mower is almost thirty years old and has had years of hard use. It's hydrostatic, and has a water-cooled two-cylinder engine with a driveshaft to a transaxle. Typical Honda sophistication.
Here the unit is in the up (transit) position. There isn't a huge amount of ground clearance, but enough to be able to drive it around most places without problems.
I bought some plastic caps to put into the ends of the square tubing to keep stuff out of them.
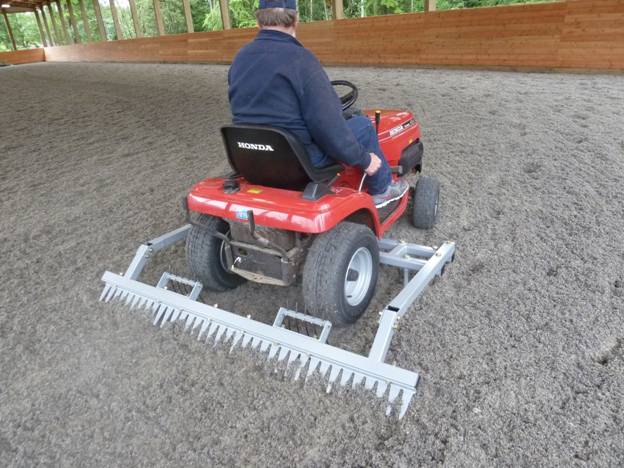
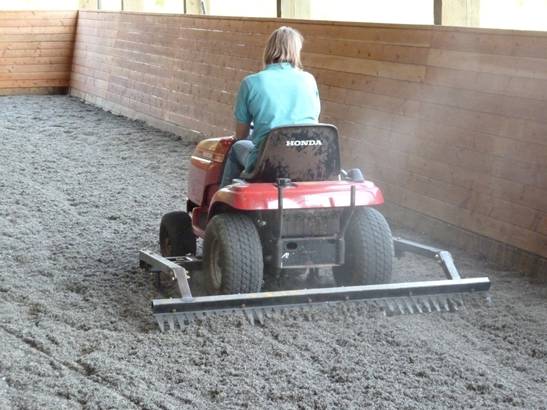
And here it is at work...
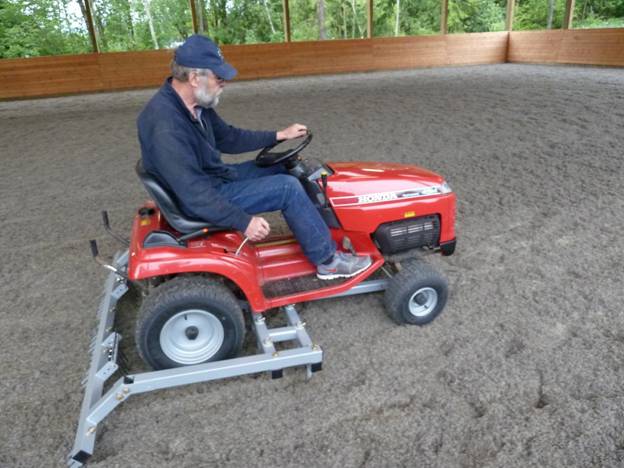
I see an old guy in the picture running it, but that can't be right, because it's me.
When I write up a project, I always like to point out what mistakes were made, and ways for improvement. In this case, I laid it all out so that the frame would be level when the tines are 2" in the ground. However, I didn't consider that the wheels would be sinking into the arena surface by about an inch, so the frame is slightly inclined in the rear when the tines are set right. I might lop a bit off the tines to remedy that. I'm still tweaking the rear tines (behind the wheels), they don't always remove the tire tracks as they are. I think I can adjust that out (not that it's a horrible flaw), but in case not, I put several holes in the brackets for the tines, so I can try different approaches if necessary.
The Honda mower has a helper spring that counter-acted most of the weight of the mower deck. So when the deck was removed, you really had to push down on the height lever to make it go down. But with the groomer installed, it takes some up-force since the groomer is heavier than the mower deck. But it's not too bad. Probably takes about ten pounds of up pressure to lift the groomer. My wife doesn't find it difficult to raise, except sometimes the button on the lift handle is a little hard to press when it is down, and you want to lift it.
Fun project!