
I thought that it would be nice to have some upgraded braking in the rear, so decided to switch the rear drum brakes to disk brakes. Also, after reading that the half-shafts are the weak point in the drive train once youve changed to an R200 differential, I decided to upgrade the half-shafts as well.
It turns out that conversion hardware for both of these changes is available from Modern Motorsports Ltd. of Vancouver BC. They make nice hardware, but dont expect any instructions, other than links on their site describing some installations by their customers. Fortunately, the company owner, Ross, is very responsive to emails. You can expect a good response to your questions within a day of emailing.
Lets start with the half-shaft conversion. The Modern Motorsports kit allows you to install Z31 turbo constant-velocity axles. Whats a Z31? Well, thats the series of 300ZX cars that Nissan made between 1984 and 1989. When shopping for these, make sure that they are from a turbo car, and have the 4-bolt flange on the end.
Heres what they will look like, with the original 240Z one topside:

The conversion kit from Modern Motorsports includes the black adapter on the bottom right of the picture, a retaining nut and washer for it, and bolts to connect the adapter to the half-shaft.
I found the half-shafts on eBay, and Ross was good enough to confirm that they were the proper ones when I sent him a link to the eBay listing.
After they came, I realized that I hadnt spent enough time looking at the smaller print in the description of the conversion kit. It turns out (and I should have seen this had I not been in a hurry) that the adapters do not fit a 240Z stub axle. Its necessary to change the stub axles to those from a 280Z stick-shift car. The 240Z has 25 splines, and the 280Z has 27 (280Z automatics are 25). I asked Ross why the adapters werent available in 25 spline versions, and he told me that I was the only person who had ever asked that. Everybody wants the later stub axles because they are so much stronger. Well, I dont know that I buy into the much stronger argument. Heres picture of the two:
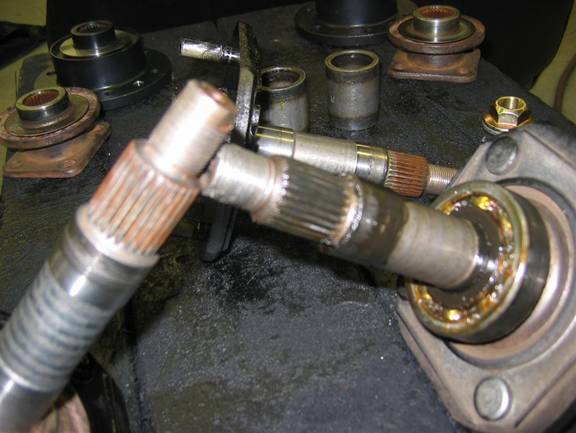
The 27-spline one on the left has a diameter of 1.090, and the 25-spline on the right has a diameter of 1.020 thats a difference of 0.070, less than 7%. Considering the cost and work of changing stub axles, I hope people keep asking for a 25-spline model until Ross offers it.
To get some 280Z stub axles, I surfed the web, and found a wrecking yard in Michigan to source a pair. When they arrived, I found that they were from a 280ZX. The wrecking yard then found a 280Z and sent me those stub axles, but the threads were screwed up from removing the nuts that are flattened on two sides after installation at the factory. Finally I found the right axles that were carefully removed at the Z Barn. Originally I thought I might get some struts from a 280Z and simply install them into my car complete, but I discovered that they are about 2 longer than the 240Z struts.
Long as you have things apart, you cant change stub axles without putting in new bearings and seals (at least I cant), so after buying the axles, these parts added about a hundred bucks to the cost of the CV conversion.
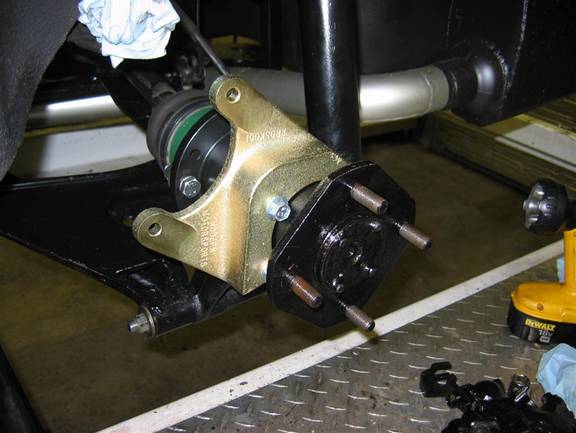
Installation of the stub axles went fairly smoothly, although I did end up taking out the rear suspension in order to work on them. This is, of course, after removing the stub axle nuts while the wheels are still on the ground they are tightened to 180-230 ft-lbs, and flattened to boot. Heres a picture of one of the rear struts with the new stub axle and CV joint adapter:
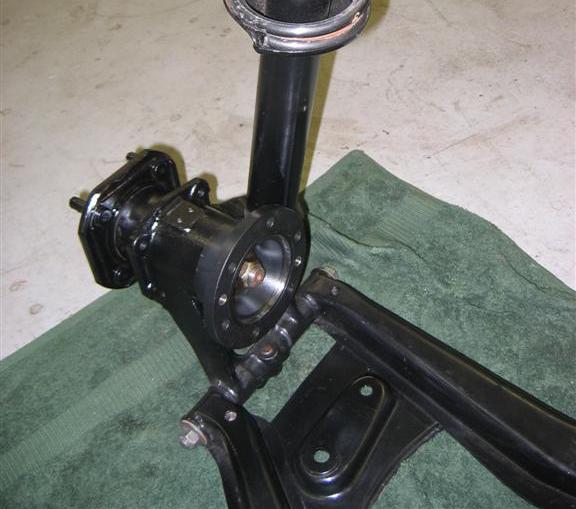
When doing the final tightening of the nuts after the suspension was back in the car, I figured that my full body weight hanging from a 16 wrench was about the perfect amount of torque necessary. Not many torque wrenches read up to 220 ft-lbs.
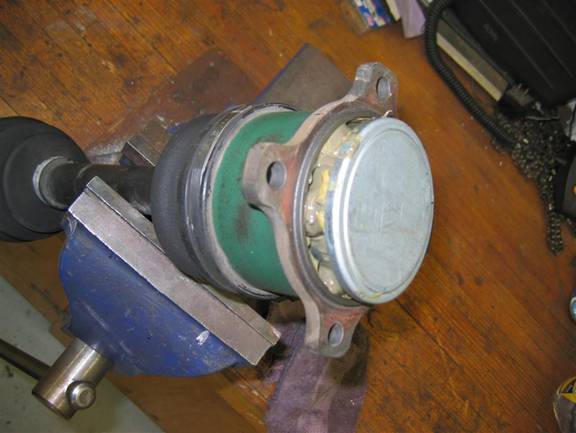
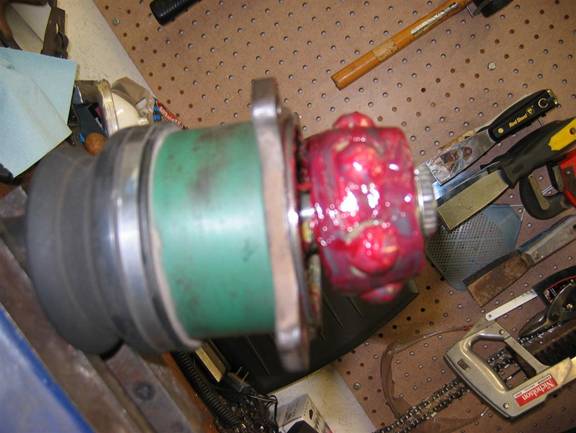
Before the CV axles can be installed, they must be shortened slightly. This is accomplished by tapping down on the flange on one end until the cover plate pops off:
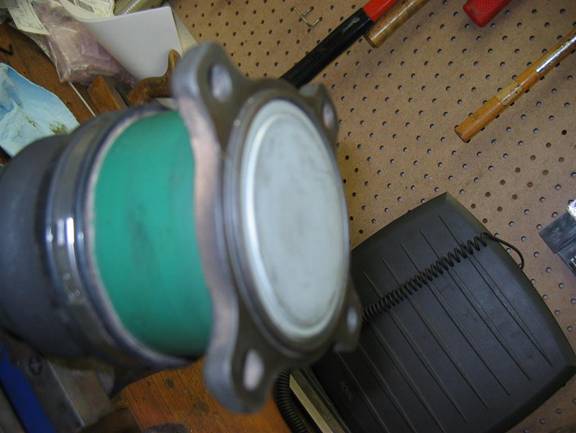
Then remove the circlip, place some tape around the ball bearings so that they dont fall out, reverse the ball assembly on the shaft, and finally reinstall the circlip:
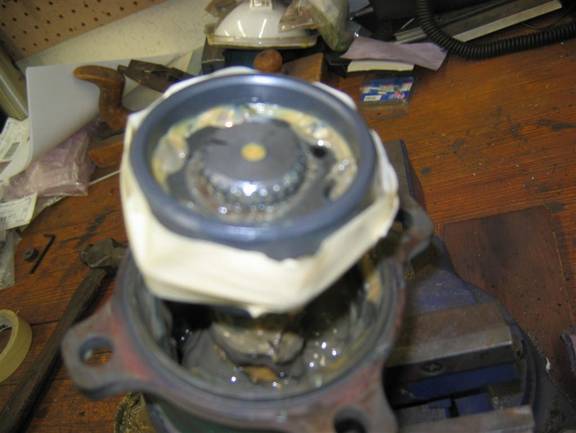
The end cap then can be tapped back on, and the shafts are ready to install.
To get the old half-shaft flanges out of the R200, simply lever them out, and the new CV shafts click back into their place. Make sure that you install the short one on the drivers side. That side is about ½ shorter than the passenger side, and even when installed properly, these half-shafts are just barely short enough to work on the early Z-cars.
I installed almost all of the self-locking nuts, lock washers and bolts included with the kit to fasten the half-shafts to the adapters, and then discovered that I hade a bunch of lock washers left over, Ross must have intended to have a lock washer on each side. I took them all back out and added the extra lock washer, but since youve read this, you will get it right the first time. It would be nice to have some brief instructions with the kits.
The stronger half-shafts are similar in weight to the original parts, the change only adds 4.4 pounds to the weight of the car.
For the brakes, the Modern Motorsports kit allows you to bolt rear 88-94 Nissan 240SX calipers onto a Z-car. It consists of nicely machined and plated caliper mounting brackets, stainless steel hoses, Brembo 11.4 diameter disks, KVR carbon fiber disk pads, mounting hardware, and links that allow you to connect the emergency brake up to the 240Z cables.
I purchased a pair of used 240SX calipers from CraigsList. It doesnt work to buy rebuilt ones at a parts store since you also need the emergency brake cable bracket which isnt included in caliper kits (called a hanger on the Modern Conversions web site). Also, for some reason, these calipers rebuilt are very expensive, yet a rebuild kit is cheap. Since the kit includes rotors, dont bother to get them, even as spares, since the ones with the kit are larger in diameter.
Heres what the parts look like, ready for installation:
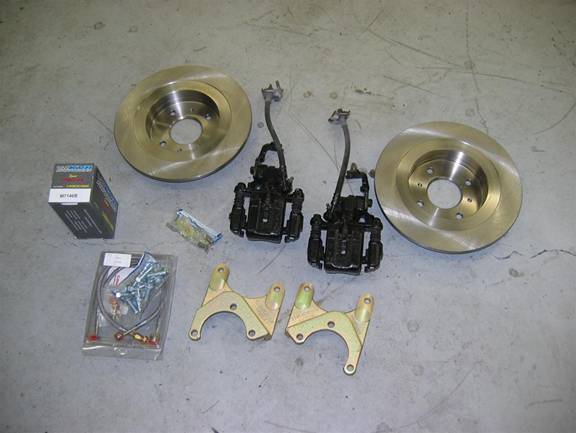
Everything shown, except the calipers, was included in the kit from Modern Motorsports. The little package by the caliper includes the emergency brake connectors.
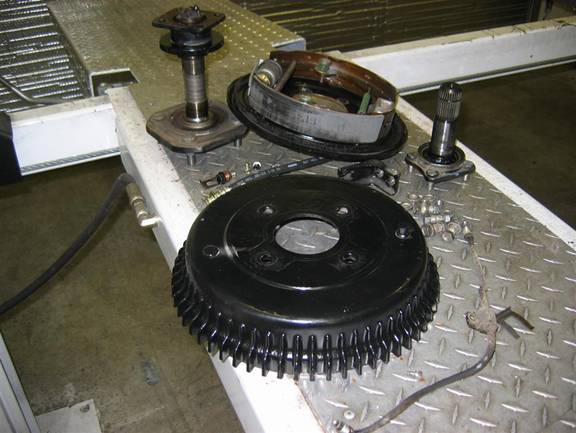
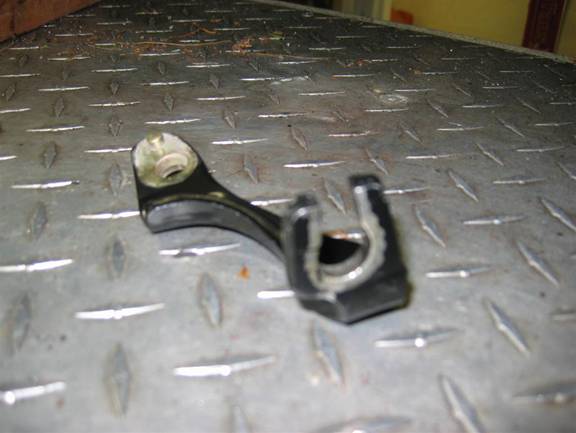
If you arent installing new stub axles, you need to remove the old drum brake backing plate by cutting it in half while in place, and then removing it. With the stub axles out, it can simply be unbolted and removed. The pile of left-over parts from this conversion is starting to build. Here are the parts left over from one side, not including the original half-shaft. Wish I would have decided to do this change earlier and saved the cost of rebuilding the original drum brakes.
The new caliper brackets are installed with provided bolts such that they angle up and towards the front of the car on each side the brackets are not the same.
The disks are then slid onto the axles, and the calipers can be bolted to the brackets. Theres a left and a right caliper, noted with an L and R on the emergency brake brackets. Or just install them so the bleeder valve is towards the top and it will be correct. If you install a caliper or cylinder with the bleeder lower than the fluid, no matter how patient your wife is as she assists in the bleeding process, she can never press the pedal enough times to get it bled.
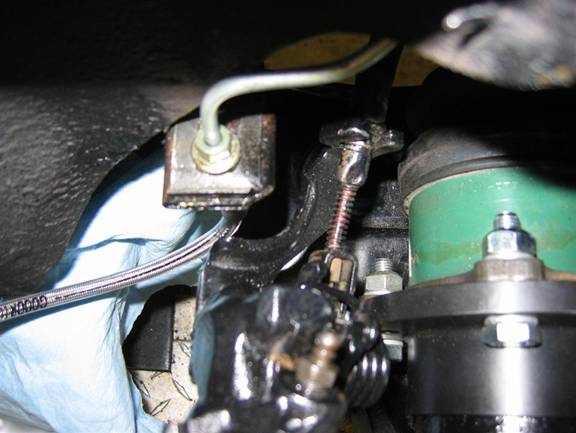
On the drivers side, the braided hose installs exactly where the original hose was connected. However, when I moved the wheel up and down with a jack, the hose bracket on the front of the wheel well hit the caliper (the e-brake bracket). In order to make clearance, it was necessary to bend the bracket forward, and radius the back of it. Its close now, but doesnt interfere:
When installing the emergency brake cables, they need to be reversed side to side in order to make the length correct. To ensure that the cables stayed in place in the caliper brackets, I closed down the opening a little so that they cant pop out:
Fortunately, the emergency brake didnt need to be adjusted after this installation thats a tough job on a stock Z with the driveshaft and differential in place, and especially now when the transmission, driveshaft and differential are all larger.
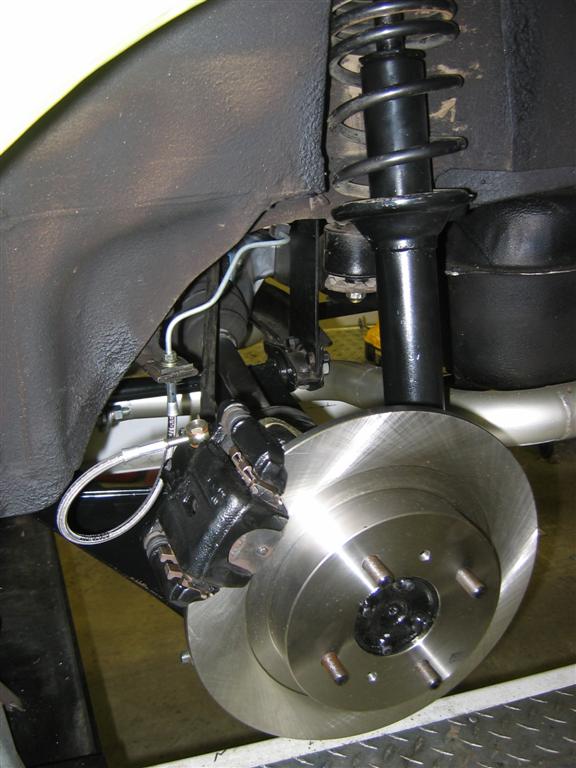
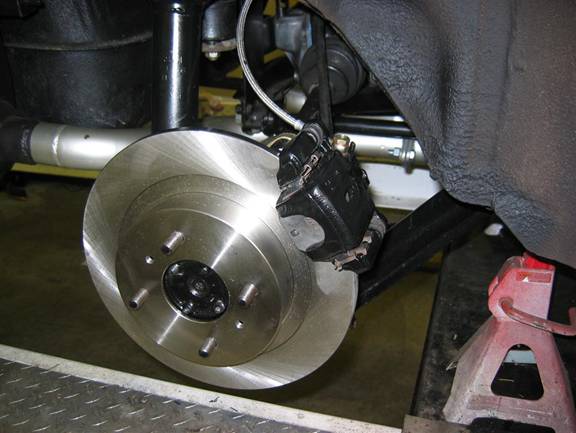
Heres what the drivers side looked like after completion:
On the passenger side, the new braided hose connects up to the Tee that splits between the two sides. It seemed like a good idea to cut off the old hose bracket since it was close to the caliper. So heres what the completed passenger side looks like:
The brake conversion adds 17.6 pounds to the rear of the car. Unfortunately, its unsprung weight. However, when I look through the Panasport wheels and see these nice looking and performing brakes, Ill gladly pay that penalty.
With these additions, hopefully the entire Z8 drive train should be about bullet-proof. Braking has a more solid feel with this conversion, but it does require a little additional pedal pressure compared to the original drum brakes.